Export formats
Pixploder's whole export suite lives in one place: the EXPORT panel that fills the right rail of Step 8 · Preview & Export. It ships eleven formats, and every one of them is assembled in your browser out of the scene Step 8 is previewing — same paint order, same placement, same baked shadows — so your Photoshop file, your engine package and your sprite sheet all describe the same picture. This page is the per-format reference: what each download contains, how your sprites are named and placed inside it, and the handful of rules that decide what makes the cut.
Costs. Every export is free, on every plan, and it is built entirely in the browser. No button in the panel carries a price, nothing is metered, and no art leaves your machine to make a file — an export only packages work you already finished on the earlier steps. Credits are spent upstream, on the AI actions; see Credits & plans.
The Export panel
The panel is the whole of the Step 8 right rail — this step exists to hand the scene off, and nothing else shares the column. Its header carries a download mark and is a toggle: click EXPORT to collapse or expand everything under it, and while it is collapsed the header shows a 11 formats hint on the right.
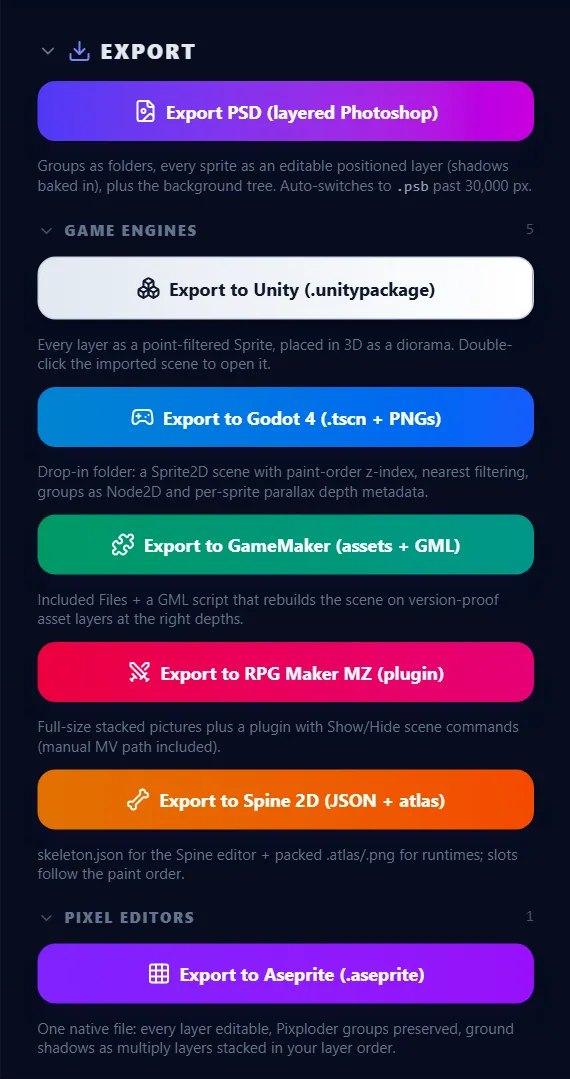
The panel opens expanded, and so do all three of its sections, so every format is on screen at rest. Export PSD (layered Photoshop) comes first, on its own, followed by three collapsible sections with a count badge each:
Game engines(6) — the Unity and Unreal Engine buttons plus Godot, GameMaker, RPG Maker and Spine.Pixel editors(1) — the Aseprite button.Universal formats(3) — Texture atlas, Cropped PNGs + JSON and Full-size layers.
Every button carries a one-line description under it, and eight of them repeat that same line as a hover tooltip — every button inside the sections except the two big engine ones, Unity and Unreal Engine, which print their line under the button only. Each section header is a toggle of its own, with a tooltip that flips between Expand Game engines and Collapse Game engines for the section it names. Fold the ones you never use and the panel comes down to the layered PSD button plus three folded headers, each still showing its count.
While an export builds, its own button shows a spinner reading Building… until the download fires. The layered PSD, the Unity package and the Unreal project each run on their own lock, so none of them blocks anything else — but the other eight formats (the four remaining engine targets, Aseprite and the three universal buttons) share a single lock, so starting any one of them dims the rest until it finishes. Export PSD (layered Photoshop) carries one extra condition: it stays disabled until the project actually has sprites. If a build finds no layers to write, nothing downloads and a notice says so — Nothing to export yet — reconstruct the scene first. from the eight that share the lock, Nothing to export to Unity yet — reconstruct the scene first. from Unity and Nothing to export to Unreal yet — reconstruct the scene first. from Unreal Engine. A builder that breaks part-way through says so as well, in a notice that names the format and the error — PSD export failed:, Unity export failed: and Unreal export failed: from those three, and the format's own name from the rest — and it releases its lock either way, so a failed run never leaves the panel stuck.
Careful. All eleven buttons refuse while the Step 8 bake is still running, and say why: Hold on — the pixel-size bake is still running. The export would ship your layers at the wrong resolution. Try again in a moment; the buttons re-enable themselves. That covers both halves of the bake — the ★ Repixelize resample and a palette snap from Step 7 · Final Polish. Wait for the preview to come back and the buttons re-enable themselves.
What every export shares
The eight packaged formats read one shared snapshot of your scene, so placement and stacking never differ between them. From back to front that snapshot is: the inpainted background as the farthest-back, full-document layer; a ground shadows plate that unions every sprite's contact shadow from Step 6 · Add Shadows; then each sprite as a cutout at its box position, with its own object shading already baked into the pixels. The Unity package, the Unreal project and the layered PSD are built on their own paths from the same scene, so they line up too — and the two engine projects are built from one shared scene tree of their own, so Unity and Unreal never disagree about a folder, a shadow or a depth.
Layer order is paint order — the order you set on Step 5 · Finish Sprites — read back to front: the sprite that paints first is the back of the scene, so it lands at the bottom of the exported stack, just above the background and the shadow plate, and the one that paints last ends up in front of everything. Inside a group, members keep the order the element tree lists them in.
Ground shadows follow that same order rather than all sitting at the bottom. The plate is styled once, as one piece — so overlapping shadows never darken twice — and is then cut into disjoint slices: ink cast by a sprite stacked above others rides in its own layer directly beneath that sprite, named <sprite name> shadow, and inside that sprite's group. Ink that nothing can be stacked under stays in the one bottom ground shadows layer. A scene whose shadows only ever fall on the background exports exactly as it always did: one plate, one layer.
That bottom layer ships inside a Shadows folder of its own — a folder in the PSD and the Aseprite file, a parent object in Unity, a World Outliner folder in Unreal, a Node2D in Godot, a shadows/ directory in the two universal ZIPs. It keeps the exact place in the stack it always had, directly above the background and below every sprite, so the folder is organisation and nothing else.
The bottom ink is one union layer, Ground shadows — it has to be, so that two shadows overlapping never darken twice — so in every format but the two engine projects the Shadows folder holds exactly that one layer. It gets a sub-folder named after a Step 6 shadow group only when every shadow in that plate belongs to the same one — falling back to the element folder its casters share, which for elements you never grouped is their tag heading. Mix two shadow groups, or two headings, and the plate sits in Shadows directly with no sub-folder. Unity and Unreal are the exception: their shadows are one quad per caster to begin with, so there you do get a child per shadow group — an object in Unity, an Outliner folder in Unreal — with the individual shadows inside. The lifted <sprite name> shadow slices are not gathered into it: each one was raised on purpose to sit above the sprite it falls on, and in a format where a folder is a run of the layer stack — Photoshop and Aseprite — pulling it down there would drop it back underneath that sprite and change the picture. Unity and Unreal are the exception the other way: their sorting order is independent of the hierarchy, so there every shadow quad hangs under the Shadows parent and the render is untouched.
Shadow styling is baked into the ink, not left as a blend mode. The Blend onto the scene mode and the Strength you chose on Step 6 · Add Shadows are folded into the shadow pixels before any file is written, so every format ships its shadows as plain normal-blend layers and every tool shows the shadow the app previews with nothing left to set by hand.
The Find & Cut tree travels with your scene — both halves of it. The folders you build yourself are one half, and they always export as folders. The other half is the collapsible category headings that tree files every top-level element under, named after its tag: a heading becomes a folder too — Signboard, Rock — so an element you never grouped by hand still arrives inside it rather than loose in a flat pile.
The rule is the panel's rule: one folder per heading, holding every top-level element that carries the tag, in the order the headings first appear — including a heading with a single element, since Find & Cut prints OBJECT (1) as a heading too. Folder names read the way that heading reads, in title case (Signboard), so they sit beside the folders you named yourself.
What that costs depends on the format, because a folder means two different things:
- Unity, Unreal, Godot and the ZIPs put the folder in the hierarchy — a parent object, a World Outliner folder, a
Node2D, a directory — while stacking is decided per object by a sorting order, a translucency sort priority, az_indexor azfield. Gathering a heading there is free: the tree changes and the rendered frame does not. - Photoshop and Aseprite make a folder a run of the layer stack, so gathering a heading actually moves layers. Sort back to front on Step 5 · Finish Sprites and the stack interleaves your tags by depth — signs behind trees behind signs — and the two files gather them anyway, into one folder per heading, the same as everywhere else: you never get a
Signboardnext to aSignboard 2. What the exporter decides is where in the stack that one folder sits. It tries every position the heading already spans and takes the one that moves as few overlapping elements past each other as it can — two elements whose bounding boxes do not touch composite the same in either order, so most moves change nothing at all. On an ordinary scene the best position costs zero and the flattened file is pixel-for-pixel what the app shows; on a scene where a heading is threaded through elements it genuinely overlaps, some pairs do swap, and only the pixels where those pairs overlap differ.
The formats that understand folders — PSD, Unity, Unreal, Godot, Aseprite — rebuild that tree, and two folders that happen to share a name stay two folders there, because those exporters key on identity and only take the display name from it. The two universal ZIPs that ship loose files nest them in real subdirectories named after the folder path. The rest keep the folder path as a text field in their JSON, so a custom loader can still regroup. Spine is the one exception: its data model has no folders, and its README says so.
Three rules decide what makes the cut.
- The approval gate. Once a project has anything to review — you have ✓-picked a sprite in Step 5 · Finish Sprites, or a run has generated something nobody has said yes to — only approved sprites export: the ones you ticked, plus every sprite that sits in no generation call at all — nothing was generated for it, so there was never anything to review and it counts as approved. Sending a result back with ↺ is not saying yes to it: the sprite keeps the take, so it keeps waiting. All eleven formats read that one set — the layered PSD included — so no format ever comes out short of layers. A project that has never been judged and has never generated anything exports everything; there is nothing to gate on yet. When the gate is on and nothing has been approved, every export button refuses rather than writing you a file with a background and no sprites: Nothing is approved yet — approve sprites with ✓ on Finish Sprites, then export.
- No hidden rows. There is no per-layer hide any more: the eye lived on Step 8's removed
Layerslist, so every approved sprite ships in every format. To keep a sprite out of the package, leave it un-approved on Step 5 · Finish Sprites — its ↺ corner puts an approved sprite back in the queue. - Texture filtering is always crisp. Every format declares
nearestfiltering, and there is nothing to set: Pixploder works in pixel art on every project.★ Repixelizeon Step 7 · Final Polish changes the resolution your files ship at, never the filtering they declare.
Once a Step 8 bake is applied, a fuchsia baked · nearest chip appears in the preview header next to the zoom read-out, naming the filtering your files will ship with and, after it, the palette that was snapped when one was armed.
Sprite names become file names through one rule across the packaged formats: lowercased, every run of non-alphanumeric characters turned into _, leading and trailing underscores dropped, trimmed to 48 characters, and a _2, _3 suffix added if two layers would collide. The Unity package and the Unreal project spell names the same way but do not trim them, and the layered PSD needs no file names at all — its layers keep the names you typed, spaces and punctuation included. If you reused one sprite's generated result on another sprite, the formats that can share a texture ship those identical pixels once and point both layers at the same file.
Note. Nothing in an export is stamped with the clock: file names come from your layer names, and the ZIP entries carry a fixed 1980 date rather than today's. Re-export an unchanged scene and you get the same files back, which makes exports safe to diff and safe to overwrite. The two exceptions are the engine projects: the Unity .unitypackage mints a fresh random asset id for every asset it packs, and the Unreal project mints a fresh project id into its Config/DefaultGame.ini, so their bytes differ each run even for an untouched scene.
Palette snaps, and the two flattenings outside the promise
If you snapped the scene to a palette on Step 7 · Final Polish, every layer in every format carries only that palette's colors on its opaque pixels — background, sprites and shadow ink alike. That is a checked promise rather than an intention: an automated test snaps a scene, pushes it through the export builders, and fails if a single opaque pixel of any per-layer product comes out in a color the palette does not hold. It covers all three universal formats, the four engine bundles that ship PNGs, and the Aseprite file; the layered PSD, the Unity package and the Unreal project sit outside that particular test.
Two products sit honestly outside the promise itself, and both are flattenings rather than layers: the composite.png inside Full-size layers (ZIP), and the PSD's merged preview together with its Original scene layer, which is a copy of your working source. Translucent shadow ink is snapped too, but what it composites to over the art beneath it is a blend of two palette colors, which is not itself one of them. Files stay full-color RGBA in every format — an indexed Aseprite mode and a PSD color table are a separate job, and the snap does not turn them on.
Sprites you kept in the background
A sprite you flagged Keep in background on Step 3 · Find & Cut still exports as its own layer, even though its pixels are also part of the backdrop image underneath it — a package you can pull apart is worth that overlap. It casts no ground shadow of its own. The Step 8 diorama preview drops those planes instead of drawing them twice, so this is the one place where the preview and the files deliberately differ.
What each format preserves
| Format | Layers editable | Folders (yours + tag categories) | Shadows | Depth metadata | Paint order |
|---|---|---|---|---|---|
| PSD / PSB | Positioned layers | Nested folders, plus group masks | one Shadows folder at the bottom; lifted ones under their caster | — | Layer stack |
| Unity | One GameObject per layer | Empty parent GameObjects, mirrored by the texture folders | All quads under one Shadows object, one per shadow group | Z position, plus per-layer depths on the component | Sorting order |
| Unreal Engine | One Paper2D sprite actor per layer | World Outliner folders, mirrored by the Content Browser folders | All billboards under one Shadows folder, one per shadow group | Y position, plus every layer's depth in the manifest | Translucency sort priority |
| Godot 4 | One Sprite2D per layer | Node2D parents, mirrored by the texture folders | Shadows Node2D at the bottom; lifted ones by their caster | metadata/pixploder_depth | Absolute z_index |
| GameMaker | Asset layers built at runtime | group field in scene.json | Own layers | depth field in scene.json | z_index → layer depth |
| RPG Maker MZ | Full-canvas pictures | group field in scene.json | Own pictures | depth field in scene.json | px_001… file order |
| Spine 2D | Slot + attachment per layer | Not in Spine's data model | Own slots | — | Slot order |
| Aseprite | One cel per layer | Real group layers | Shadows group at the bottom; lifted ones under their caster | — | Layer stack |
| Texture atlas + JSON/XML | Frames on one packed sheet | group in meta.layers | Own frames | depth in meta.layers | z_index in meta.layers |
| Cropped PNGs + JSON | One trimmed PNG per sprite | Subdirectories, plus group | sprites/shadows/, plus the group when they share one | depth in scene.json | z_index in scene.json |
| Full-size layers (ZIP) | One canvas-size PNG per layer | Subdirectories, plus group | layers/shadows/, plus the group when they share one | depth in layers.json | 00_, 01_ prefix and z_index |
The eleven downloads at a glance
| Button | Downloads | Opens in |
|---|---|---|
Export PSD (layered Photoshop) | pixploder-layers.psd | Photoshop, or any editor that reads layered PSD |
Export to Unity (.unitypackage) | pixploderdiorama.unitypackage | Unity 6 |
Export to Unreal Engine (UE5 project) | pixploder_unreal.zip | Unreal Engine 5.3 or newer |
Export to Godot 4 (.tscn + PNGs) | pixploder_godot.zip | Godot 4 |
Export to GameMaker (assets + GML) | pixploder_gamemaker.zip | GameMaker Studio 2.3+ and 2024+ |
Export to RPG Maker MZ (plugin) | pixploder_rpgmaker.zip | RPG Maker MZ, and MV by hand |
Export to Spine 2D (JSON + atlas) | pixploder_spine.zip | The Spine editor, or a Spine runtime |
Export to Aseprite (.aseprite) | pixploder.aseprite | Aseprite |
Texture atlas + JSON/XML | pixploder_atlas.zip | Phaser 3, PixiJS, Starling, any atlas-aware engine |
Cropped PNGs + JSON | pixploder_sprites_json.zip | Any custom loader |
Full-size layers (ZIP) | pixploder_layers.zip | Any image software at all |
Every ZIP unpacks into a single top-level folder — named after the file, except pixploder_unreal.zip, which unpacks into PixploderDiorama/ because that folder is the Unreal project — and every ZIP ships a README with the steps for that target: README.txt, README.md for the Unreal project, and README_GAMEMAKER.txt / README_RPGMAKER.txt for those two.
Photoshop — the layered PSD
Export PSD (layered Photoshop) is the flagship, and the one button the panel shows without opening a section. Its line reads "The Find & Cut tree as folders, every sprite as an editable positioned layer (shadows baked in), a Shadows folder and the background tree. Auto-switches to .psb past 30,000 px."
It downloads pixploder-layers.psd: a fully layered document where the whole Find & Cut tree becomes real Photoshop folders (nested, collapsed when it opens) — the folders you built and the tag category each top-level element clusters under — each sprite is an editable layer at its own position with its shading baked in, and a group's mask arrives as a Photoshop group mask with the members still individually editable inside it. A sprite whose rebuilt artwork reaches past the canvas keeps those pixels and hangs over the edge, exactly as the app draws it. A sprite whose folder is missing from the file — a stale parent link left behind by an edited element tree — is rescued to the top level rather than quietly dropped.
Beneath the sprites sit the raw materials, bottom-up:
Original scene— your untouched working image.Background (scene minus elements)— a hidden layer of full scene pixels under a non-destructive mask that hides every cut-out element, written whenever at least one exported element carries a mask. Sprites you kept in the background are deliberately left showing in it, because their pixels belong to the backdrop. Paint the mask in Photoshop to bring other pixels back; nothing is baked out.- The
Backgroundfolder — the editable patch tree you built in Step 4 · Rebuild Backplate, mirrored as nested folders with each patch's hole mask as an inverted layer mask. It is written only when the tree holds more than the bare base, and a patch you switched off with itsHideeye on Step 4 arrives as a hidden Photoshop layer rather than a missing one. - The
Shadowsfolder — holdingGround shadows, the one union layer of ink no sprite can be stacked under. When every shadow in it belongs to the same Step 6 shadow group, that group is a sub-folder in between; otherwise the layer sits inShadowsdirectly.
Any shadow that has to sit above a sprite is not in that folder — it arrives as a <sprite name> shadow layer placed directly beneath its own sprite, inside the same folder as the sprite, so dragging the folder keeps the two together. That is why Shadows holds only the bottom ink: a Photoshop folder is a run of the layer stack, so moving a lifted shadow into it would drop it back under the sprite it is meant to fall on. Shadow layers are plain Normal layers on purpose, because the blend and strength you set on Step 6 are already in the ink.
This is the only format that preserves the editable background patch tree and the raw scene-minus-elements layer — every other format flattens the backdrop to one image. It is also the only format written at your source resolution: after a ★ Repixelize bake the other ten ship the small baked document, while the PSD keeps the original canvas size and carries the repixelized art inside it as chunky pixels. For a canvas over 30,000 px on either side the export switches itself to the Large Document Format and downloads pixploder-layers.psb instead: same contents, in the container Photoshop needs to open a document that size.
Note. Two things in the file are deliberately outside the polished stack: the Original scene layer, and the flattened preview Photoshop shows until it has composited the layers itself. Both are a copy of your working source, so a Step 7 palette snap leaves their colors alone.
Game engines
Six targets. Unity and Unreal Engine have their own prominent buttons at the top of the section; the other four sit below them.
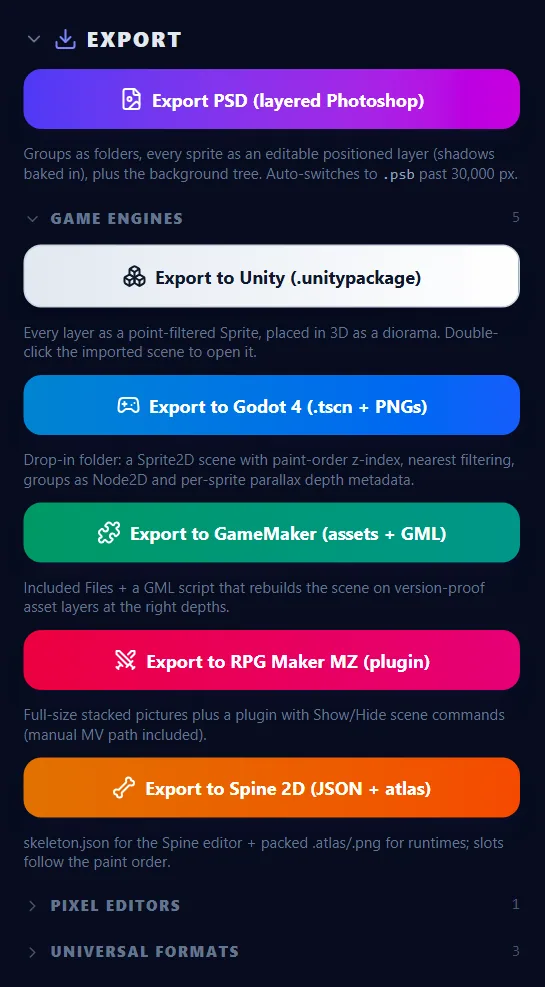
Export to Unity (.unitypackage)
"Every layer as a point-filtered Sprite, placed in 3D as a diorama. Double-click the imported scene to open it."
Downloads pixploderdiorama.unitypackage, a Unity 6 package built as a gzipped tar in the browser. Import it into a project and double-click Assets/pixploderdiorama/pixploderdiorama.unity. Inside are a Sprites/ folder, a Shadows/ folder, a Scripts/ folder holding the PixploderDiorama.cs component, and the ready scene.
The texture folders mirror the Hierarchy. Wherever an element has a folder in the Hierarchy it has the same directory here: Sprites/<Folder>/<Sub>/ for one inside a folder you built, Sprites/<Heading>/ for a top-level element whose category earned a folder, Sprites/ itself for one that stayed loose, and the backdrop always at Sprites/background.png. Ground shadows live apart from the artwork under Shadows/, with the shadow group as a directory in between. Every one of those directories is registered in the package as a real folder asset, so Unity creates the tree on import instead of dropping sixty files into one directory.
Every layer becomes a Single Sprite on its own GameObject, placed in 3D by the same depth model the Step 8 diorama uses; folders become empty parent objects mirroring your tree; and sorting order follows paint order, so overlaps match. Each ground shadow is its own upright quad, still sorted one step below its caster, and they all hang together under one Shadows object with a child per shadow group. Unity's sorting order is independent of the hierarchy, so that parenting tidies the Hierarchy and the Project window without moving a single pixel. Orbit the Scene view to see the depth, and drag Parallax Separation on the PixploderDiorama component in the Inspector to spread the layers apart or flatten them — the component holds explicit references to every layer and its depth, so re-parenting in the Hierarchy is safe.
Note. Unity shadows are per-caster billboards rather than slices of one union plate, so two overlapping shadows can darken twice there. The Unreal project inherits that, because it is built from the same tree; every other format ships the single styled plate.
Export to Unreal Engine (UE5 project)
"A ready-to-open .uproject: every layer becomes a Paper2D sprite placed in 3D, and the diorama map builds itself the first time you open the project."
Downloads pixploder_unreal.zip, which unpacks into a single PixploderDiorama/ folder — a complete, content-only Unreal Engine 5 project. There is nothing to import and nothing to compile:
- Unzip the folder anywhere.
- Double-click
PixploderDiorama.uproject. - Wait. The first launch imports the artwork, builds the sprites, assembles the map and opens it — a few seconds for a small scene, up to a minute for a large one, with the progress tagged
[Pixploder]in the Output Log. Every launch after that opens straight into the finished map.
The project carries no C++ modules, so Unreal never offers to rebuild anything and no compiler is involved. It also names no engine version, so the very first double-click may ask you to pick one: choose 5.3 or newer and Unreal writes the choice into the .uproject and stops asking. Right-click the .uproject → Switch Unreal Engine Version to change it later.
Inside the folder sit the .uproject itself, with Paper2D and the editor's Python plugin turned on; a Config/ folder that points the startup map at the diorama; Content/Python/, holding the builder script and the manifest that describes your scene; SourceArt/, the original PNGs; and a README.md repeating all of this. Content/2D_Assets/ and Content/Maps/ are not in the download at all — a browser cannot write an Unreal asset, so the first launch creates both and fills them with your textures, your sprites and the map.
The Content Browser mirrors the World Outliner the same way Unity's Project window mirrors its Hierarchy — the two engine exports read one shared scene tree, so their folders match name for name. Each layer arrives twice: as a T_<name> Texture2D under Content/2D_Assets/Textures/… and as a Spr_<name> PaperSprite under Content/2D_Assets/Sprites/…, both filed in a directory that mirrors your element tree — Sprites/<Folder>/<Sub>/ for one inside a folder you built, Sprites/<Heading>/ for a top-level element whose category earned a folder, and Shadows/ for the ground shadows, with the shadow group as a directory in between. The backdrop is T_background and Spr_background at the root.
The layer tree lands in the World Outliner as folders, under one PixploderDiorama root, with a Shadows folder for the ground-shadow billboards. Folders are how Unreal keeps a level tidy, and they cost nothing: sorting is per sprite, so moving a folder cannot restack the picture. If you would rather have real parent actors, set USE_ACTOR_ATTACHMENT = True at the top of the builder script and run it again.
In the map every layer is a Paper2D sprite actor standing in the X/Z plane — X is screen-right, Z is screen-up — and the deck is spread along Y, with layers nearer the viewer at a larger Y and the backdrop farthest back. The export spawns its own orthographic camera on +Y looking down -Y, framing the scene, so the convention is something you can see rather than something to guess. Paint order rides on each sprite's translucency sort priority, which is independent of the hierarchy, so overlaps match the app. Textures import point-filtered, with no mipmaps and no block compression — the nearest filtering every export declares becomes Unreal's own nearest filter here — and each sprite's pixels-per-unit is set so it covers exactly the area it covered in the original picture, including the native-resolution textures a ★ Repixelize bake leaves behind.
To change the parallax, open Content/Python/build_pixploder_diorama.py and set PARALLAX_SEPARATION near the top — None keeps the value the export chose, which is roughly the height of your picture, and 0 flattens the diorama back to a 2D composite — then run the script again. File → Execute Python Script… runs it, and so does import build_pixploder_diorama as b; b.relayout(2000) in the Output Log's Python mode, which re-places every actor without re-importing a single texture. That is also the manual fallback if the automatic first-launch build never fires.
Note. The first launch has one cosmetic hiccup. The editor is told to open the diorama map before that map exists, so it logs a failed load and shows a blank level for a moment before the builder creates the real one and opens it. It happens exactly once. SourceArt/ is deliberate too: it sits outside Content/ because the editor auto-imports loose files it finds under Content/ with its own default settings. Leave it where it is if you plan to rebuild, and note that deleting it does not touch the assets already imported.
Careful. Unreal shadows are per-caster billboards rather than slices of one union plate, the same as Unity's, so two overlapping shadows can darken twice there. The project ships content and nothing else — no Blueprints, no game code, no animation — and if a scene ever arrives offset by exactly one sprite's height, set PIVOT_TOP_LEFT = False at the top of the builder and run it again.
Export to Godot 4 (.tscn + PNGs)
"Drop-in folder: a Sprite2D scene with paint-order z-index, nearest filtering, groups as Node2D and per-sprite parallax depth metadata."
Downloads pixploder_godot.zip — a pixploder_godot/ folder holding a text scene.tscn (format 3), a sprites/ folder of trimmed PNGs and a README. Copy the folder into your project root, let Godot import the PNGs, and double-click the scene.
Under a PixploderScene root, each layer is a Sprite2D with centered = false at its top-left position in document pixels, a nearest texture_filter, and an absolute z_index (z_as_relative = false) carrying the paint order, so re-parenting in the editor cannot change the stacking. Folders — yours and the tag categories — are Node2D parents, and the FileSystem dock mirrors that: a texture lives under sprites/<folder>/…, with the ground-shadow plate under sprites/shadows/…. In the scene the bottom ground-shadow layer sits under a Shadows Node2D, with its shadow group beneath it when they all share one. Shadow layers need no material of their own. Every sprite carries metadata/pixploder_depth (0 far … 1 near) for a parallax script — the README even suggests the one-liner. Godot may log UID notices the first time it opens a text scene authored elsewhere; saving once clears them.
Export to GameMaker (assets + GML)
"Included Files + a GML script that rebuilds the scene on version-proof asset layers at the right depths."
Downloads pixploder_gamemaker.zip: the images and a scene.json under datafiles/pixploder/ to drop into Included Files, plus scripts/scr_pixploder_build/scr_pixploder_build.gml. Paste the script into a script asset of that name, call pixploder_build_scene() from a room's creation code, and the scene rebuilds at runtime on asset layers — the background at depth 15000 and every sprite 10 depth-steps closer, so your own instances can slot between them. It deliberately never touches the fragile project format, which is what makes it work on every recent GameMaker version.
Export to RPG Maker MZ (plugin)
"Full-size stacked pictures plus a plugin with Show/Hide scene commands (manual MV path included)."
Downloads pixploder_rpgmaker.zip: every layer as a full-canvas picture named in paint order under img/pictures/ (px_001_…, px_002_…), a js/plugins/PixploderScene.js plugin with Show Pixploder scene and Hide Pixploder scene commands (both take a First picture ID), and a scene.json for reference. The layer list is baked into the plugin at export time, so it is self-contained. Every picture is shown at (0,0) with normal blending. Because every picture goes at the same place, the README also documents a manual Show-Picture path that works in MV.
Export to Spine 2D (JSON + atlas)
"skeleton.json for the Spine editor + packed .atlas/.png for runtimes; slots follow the paint order."
Downloads pixploder_spine.zip, which serves both Spine paths at once: a skeleton.json with a loose images/ folder for the editor's Import Data route, plus a packed skeleton.png and libGDX-format skeleton.atlas that a runtime can load without opening the editor. One root bone sits at the document's bottom-center, and each layer is a slot plus a region attachment on the default skin, in paint order — first slot drawn behind. The data is written as Spine 4.1, which any 4.1-or-newer editor imports. Group names are not part of Spine's data model, so the slot list is flat.
Careful. RPG Maker MZ shows at most 100 pictures at once — if your scene ships more than 99 layers the README flags it and suggests merging some layers back in Pixploder first. And mind the folder names the two loaders hard-code: the Godot scene reads its textures from res://pixploder_godot/sprites/…, so that ZIP's top-level folder goes into the project root unrenamed, and the GameMaker script reads pixploder/scene.json, so the pixploder folder out of datafiles/ has to land in Included Files under exactly that name.
Pixel editors
One native-file export, written straight from the file-format spec — no ZIP, no README, just the file.
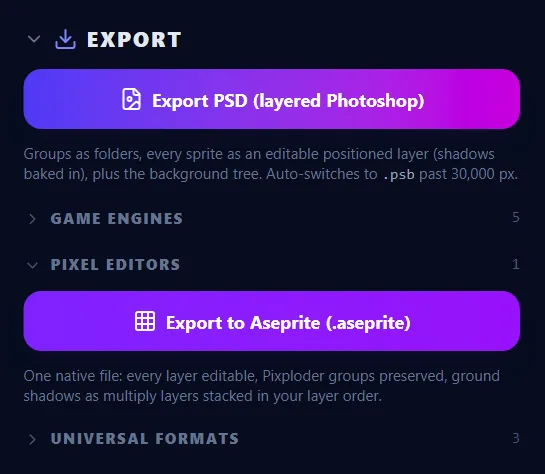
Export to Aseprite (.aseprite)
"One native file: every layer editable, Pixploder groups preserved, ground shadows as their own already-shaded layers stacked in your layer order."
Downloads a single pixploder.aseprite with every layer editable and every Pixploder folder — the ones you built and the tag categories — preserved as a real Aseprite group layer, in bottom-to-top order, with the bottom ground-shadow layer inside a Shadows group of its own (and its shadow group in between when every shadow in it shares one). Each non-empty layer becomes one zlib-compressed cel trimmed to its visible pixels, in sRGB RGBA. Ground shadows are stacked in your layer order exactly as the panel's line says — each in its own layer, directly under the sprite that casts it — and they arrive already shaded, on Aseprite's Normal blend rather than Multiply, because the blend and strength you set on Step 6 are baked into the ink itself; a multiply on top of that would darken the scene twice. The document is clamped to 65,535 px per side, the hard ceiling the format allows.
Universal formats
Three engine-agnostic hand-offs for custom pipelines — MonoGame, Raylib, Phaser, PixiJS or a loader you wrote yourself. Each ZIP ships a README that spells out the reconstruction, and the atlas one adds copy-paste loader snippets.
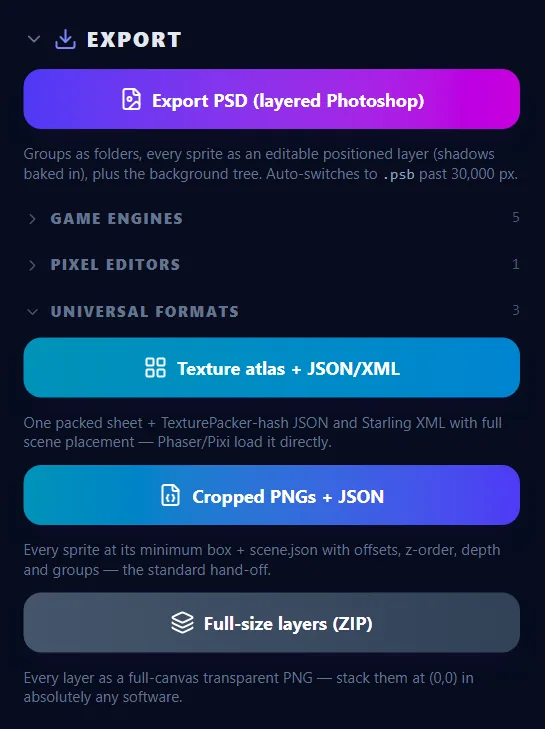
Texture atlas + JSON/XML
"One packed sheet + TexturePacker-hash JSON and Starling XML with full scene placement — Phaser/Pixi load it directly."
Downloads pixploder_atlas.zip: one packed atlas.png, plus atlas.json (TexturePacker "JSON hash", which Phaser 3 and PixiJS load directly) and atlas.xml (Starling/Sparrow, the same data). Frames are shelf-packed on a power-of-two sheet with a 2-pixel gap and no rotation; nearest sampling never reaches across a frame border, so there is no edge extrusion to pay for. Every frame's source size is the whole document and its trim offset is its position in it, so drawing each frame at (0,0) with a top-left origin rebuilds the scene with no math. The full background stays off the sheet as its own background.png — packing it would roughly double the sheet — and is listed in the metadata with its position. That metadata, under meta.layers, also carries every layer's paint order, depth, blend and group for a hand-rolled loader.
Cropped PNGs + JSON
"Every sprite at its minimum box + scene.json with offsets, z-order, depth and groups — the standard hand-off."
Downloads pixploder_sprites_json.zip: every sprite trimmed to its minimum bounding box under sprites/ (element folders become subdirectories under it, and the bottom ground shadow lands in sprites/shadows/, with its shadow group after that when every shadow in it shares one), the backdrop as background.png, and a scene.json that spells out each sprite's top-left x/y, its center offset, size, z-order, depth, blend and group. Coordinates are whole pixels except the center offsets, which can end in .5 for odd-sized sprites. The README carries reconstruction pseudocode for both the top-left and the center anchoring convention.
Full-size layers (ZIP)
"Every layer as a full-canvas transparent PNG — stack them at (0,0) in absolutely any software."
Downloads pixploder_layers.zip: every layer as a full-canvas transparent PNG in a layers/ folder, numbered in paint order (00_, 01_, 02_ …) — element folders become subdirectories under layers/ and the bottom ground shadow lands in layers/shadows/, with its shadow group after that when every shadow in it shares one, and with the numbering staying global across them so it still spells out the whole stack — plus a flattened composite.png to check the result against and a layers.json listing names, z-order, depth, blend and group. Stack the PNGs at (0,0) in ascending order, in any software at all, and the scene rebuilds itself.
Tip. Not sure which universal format to grab? Cropped PNGs + JSON is the standard hand-off for a custom engine — compact, and it carries full placement data. Full-size layers (ZIP) is the zero-math fallback for when you just want to drop images on top of each other and see the scene, in literally any image tool.