Step 1 · Source Art
Every project starts here. Step 1 is the front door: you either bring your own 2D art — a PNG, a JPG, or a layered PSD — or describe a scene in words and let the AI draw one. Whichever route you take, Pixploder measures the image, probes its pixel grid to seed the later steps' defaults, and keeps it as the source every later step works from. Art you bring in has one hard limit — 4096 px on its longest side — and there is no style switch to set: the editor always works in pixel art. You are done the moment a working image is loaded and the right panel flips from Source Art to Source Art Review, the read-out that reports your source size and points you on to extending, segmenting, or a clean restart.
Costs. One control on this step spends credits: Generate, under Generate a scene with AI. It costs 10 credits per scene on the recommended model and 25 on either of the other two, and the button prints the price of your pick before you click it. Everything else is free — uploading a PNG or JPG, importing a PSD, editing the prompt, choosing a model or an aspect, previewing a result, restoring its prompt, saving it, Use this image, and every control on Source Art Review. See Credits & plans.
Bring in your own art
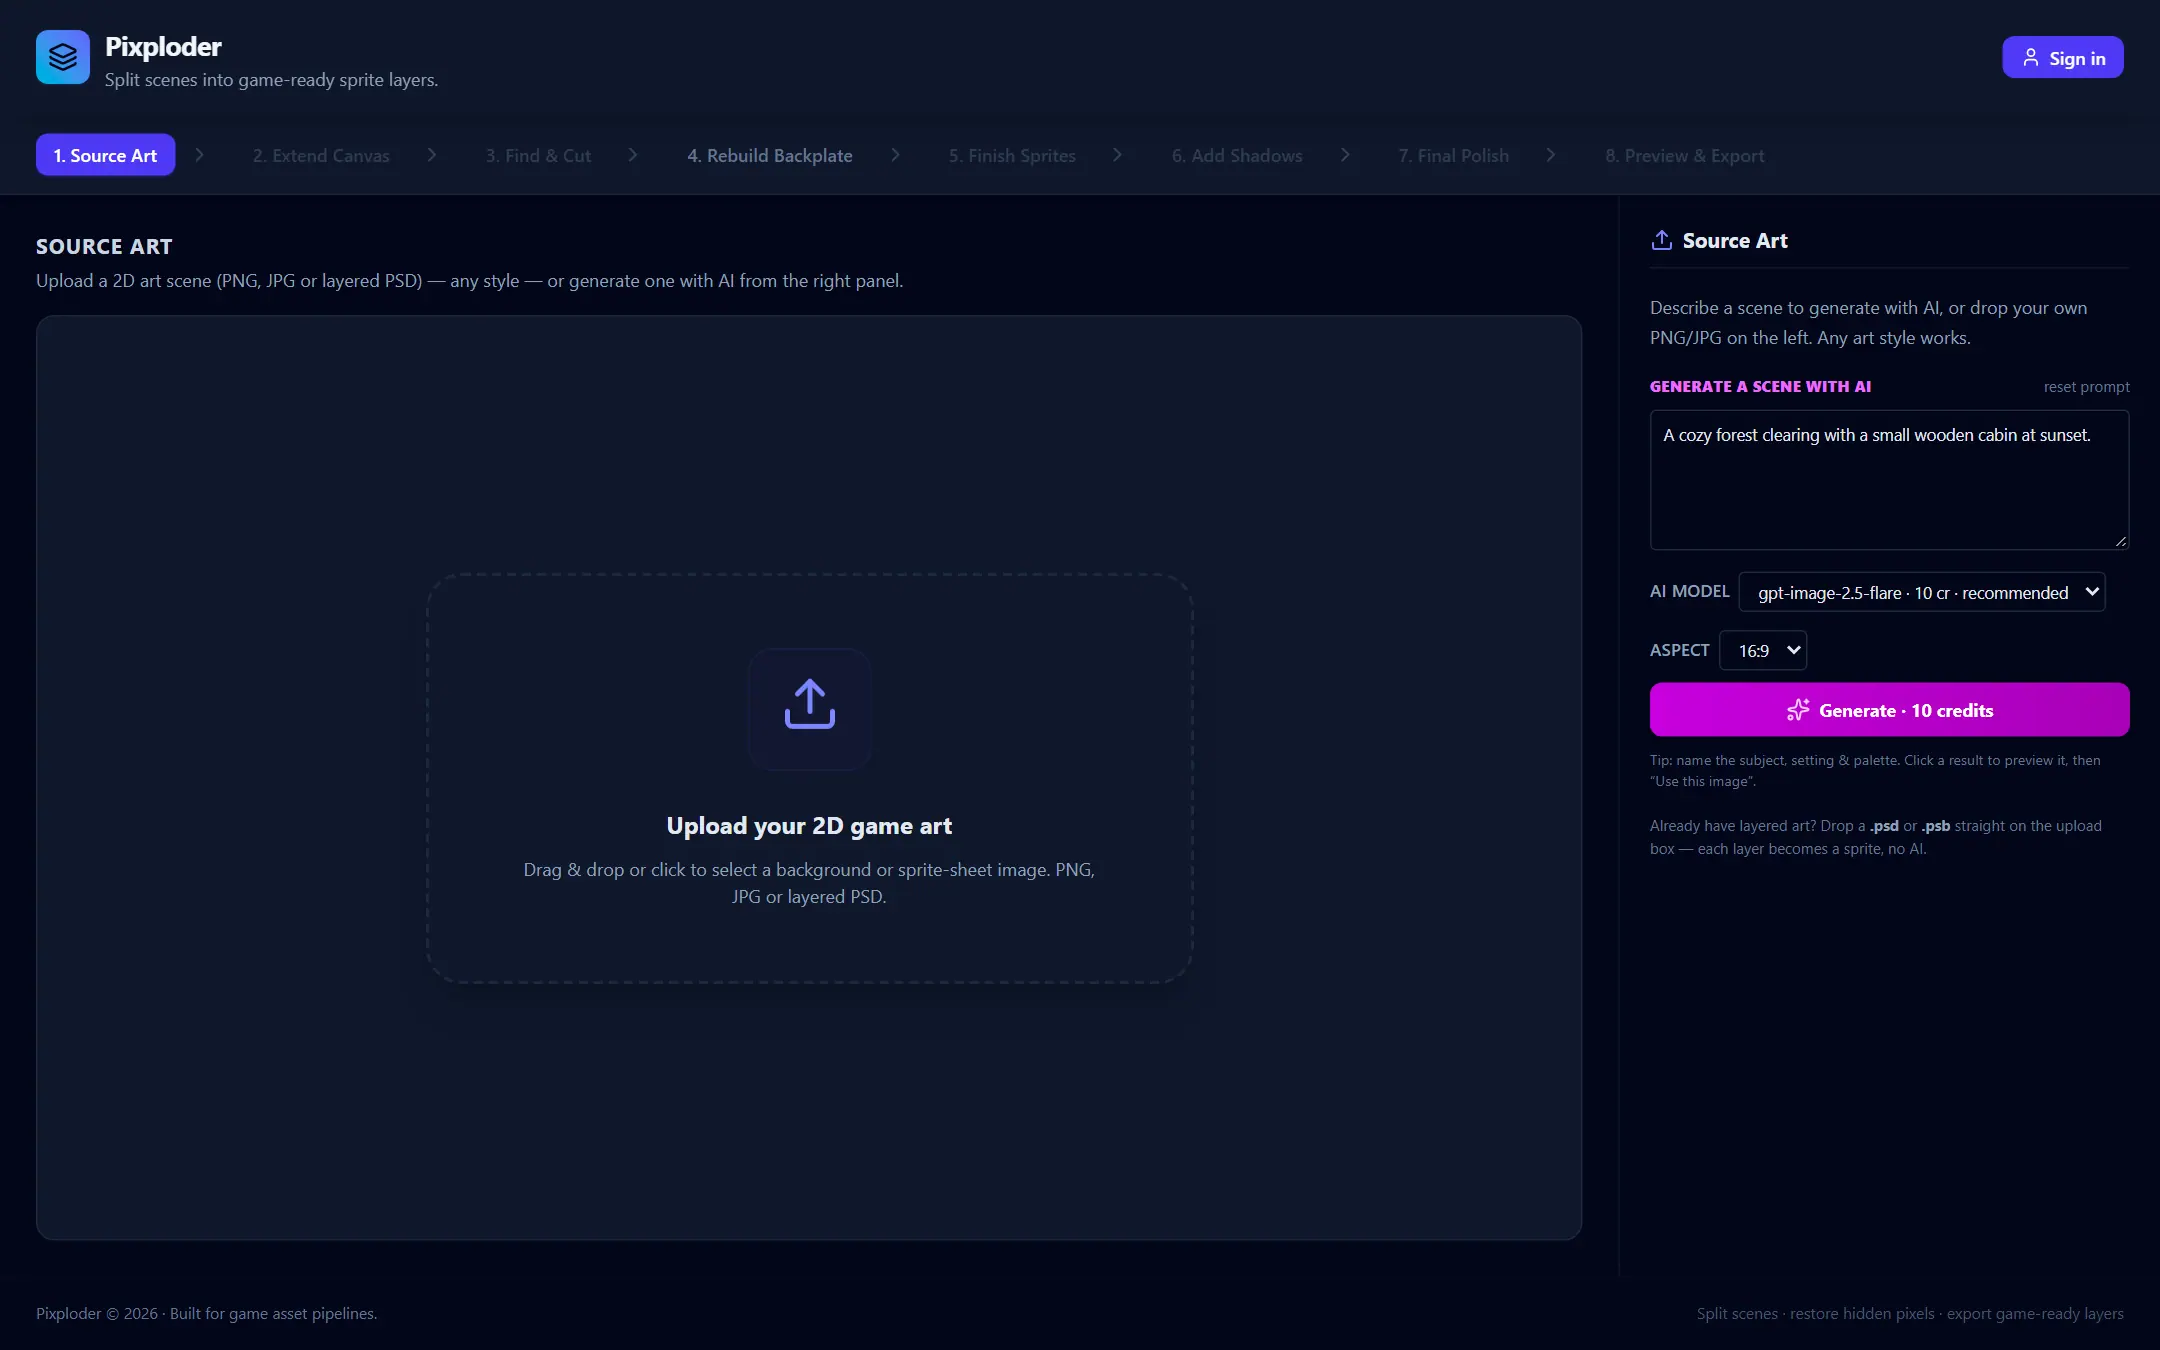
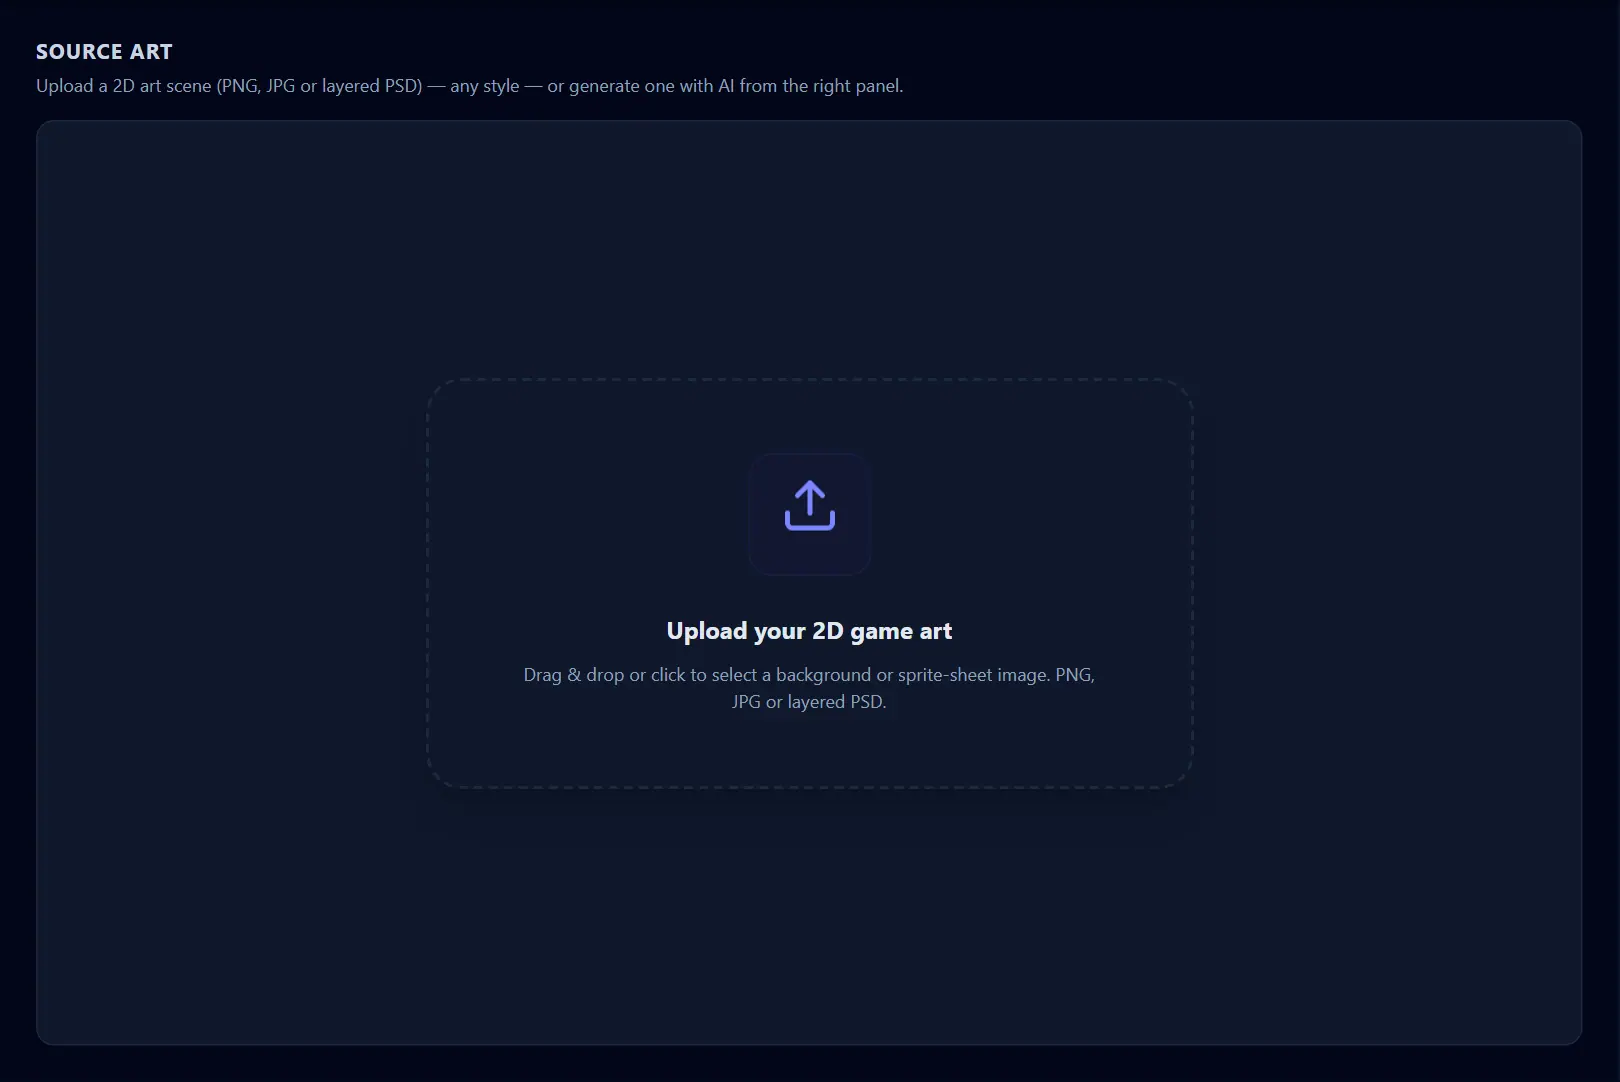
The left pane is headed Source Art and reads Upload a 2D art scene (PNG, JPG or layered PSD) — any style — or generate one with AI from the right panel. With nothing loaded yet it offers one way in for art you already have — free, and handled entirely inside your browser.
Upload your 2D game art— the large dashed dropzone (Drag & drop or click to select a background or sprite-sheet image. PNG, JPG or layered PSD.). Drop a file onto it or click to browse. Until you roll a generation, the right panel points at it in one line:Already have layered art? Drop a .psd or .psb straight on the upload box — each layer becomes a sprite, no AI.- A flat image (PNG, JPG, and anything else your browser decodes) — Pixploder reads the file locally, sizes the canvas to the image, probes its style, clears any elements from before, and switches the right panel to
Source Art Review. - A layered PSD (
.psdor.psb) — routed by its file extension, so a drop and a picked file behave the same. The flattened composite becomes your source image, and every raster layer becomes a ready-made element carrying its name, its position, and its own cut-out pixels — so you land directly on Step 5 · Finish Sprites with extending, locating and segmenting already behind you. If you already have layered art, this is the fastest route to game-ready sprites.
The dropzone owns the empty left pane, so as soon as a generation exists the preview takes that space and the dropzone is gone until you start over — the Upload a PNG / JPG / PSD button in the right panel is the route from then on.
Careful. Source art is capped at 4096 px on its longest side. Anything larger is refused before it lands, so the scene you already have stays on screen untouched — a dialog names the file's own size and the limit, so a 6000 × 3200 px PNG answers That image is 6000 × 3200 px. Source art is capped at 4096 px on its longest side — scale it down and bring it in again. A PSD is measured the same way, on its canvas, read straight out of the file header before a single layer is decoded: That PSD's canvas is …. Scale the file down in your own editor and bring it in again. The cap is on what you bring in — a canvas you grow on Step 2 · Extend Canvas, a generated scene, and a project you reopen are never measured against it.
Note. PSD import uses no AI and no network, so it works on any plan. It flattens groups down to their leaf layers, skips empty, zero-size and fully transparent ones, keeps the first 60 usable layers after that, and trims each layer name to 60 characters. A layer's opacity slider comes with it, baked into that sprite's own transparency. Every layer arrives visible, including one you had hidden in Photoshop — there is no eye switch left in the editor to turn a hidden sprite back on, so an unwanted layer is deleted on Step 5 · Finish Sprites instead. A file Pixploder cannot use says why, in a dialog: Could not import that PSD: This PSD has no canvas size. or Could not import that PSD: No usable layers found in this PSD.
Tip. A file the browser cannot open is reported, not swallowed. An unreadable file answers Could not read that file — the browser was not able to open it. If it came from cloud storage or a network drive, download it locally and try again., and a format the browser cannot decode answers Could not open “…” — this browser can't decode that image format. HEIC (iPhone) and camera RAW files usually need converting first; save it as PNG, JPEG or WebP and try again.
Generate a scene with AI
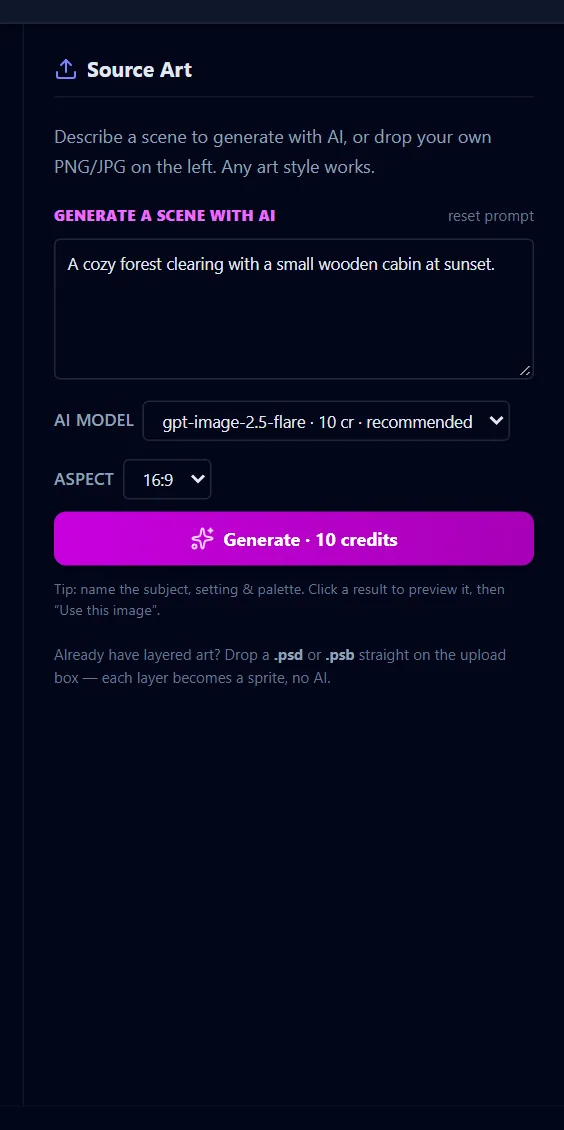
The right panel carries the same Source Art heading and reads Describe a scene to generate with AI, or drop your own PNG/JPG on the left. Any art style works. It turns a description into a brand-new scene. This is the one credit-spending action on the step, and results stack up, so you can roll several before committing to one.
- Prompt box — opens pre-filled with an example (
A cozy forest clearing with a small wooden cabin at sunset.). Replace it with your own scene, in any art style.reset prompt, at the right of theGenerate a scene with AIheading, puts the example back; emptied, the box shows the hintDescribe the scene you want to generate — any art style…andGeneratestays disabled. AI model— which AI draws the scene. The list holds three entries, each labeled with the model's id and its own per-image price in credits. The suggested one costs 10 credits and carriesrecommended; the other two cost 25 each, so the choice between them is about results rather than cost. Your pick sets the number on the button below, is shared with the other scene-level AI actions — the fill on Step 2 · Extend Canvas, the repaint on Step 4 · Rebuild Backplate — and is remembered in this browser.Aspect— the shape of the output:16:9(the default),1:1,4:3,3:2,9:16, or21:9. Your source art does not have to keep this shape — Step 2 · Extend Canvas can reframe it later.Generate · 10 credits— spends the credits and draws one scene; the number follows the model you picked. While it runs the button readsGenerating…and the left pane showsGenerating your scene…aboveThis usually takes 10–30 seconds.The finished image is added toYour generationsand previewed on the left.
The line under the button is the short version of all of it: Tip: name the subject, setting & palette. Click a result to preview it, then “Use this image”.
A paid run opens a confirmation first: Use 10 credits? names the cost and your remaining balance, offers a Don't ask again this session checkbox, and waits for Use 10 credits or Cancel — backing out spends nothing, and the confirmation comes back on every run until you tick that box. The number is your picked model's price, so it reads Use 25 credits? on either of the other two. If your plan or your balance cannot cover the run, a Heads up dialog explains why (Your plan doesn't include AI generations. Upgrade to Pro., or This needs 10 credits but you have …) and offers See plans next to Got it instead. And when no model is on offer for scene generation, an amber Scene generation is temporarily unavailable — try again later. line appears above the button, the picker reads AI model unavailable, and Generate stays disabled. A run the server itself stops — generation paused across Pixploder — is refused before anything is charged, in the same dialog: Pixploder is under maintenance — generation is paused for a moment. Nothing was charged.
Note. The generation runs on Pixploder's servers, not inside the page — your browser only waits for the result. A slow connection, a sleeping laptop, or a tab pushed to the background will not cancel it; the image lands when your tab catches up. If you reload or close the tab, the run still finishes and the credits are still spent — and the next time you open the editor the result is waiting in a Recovered generation card in the bottom corner, labeled Scene generation, with Download to save the PNG. Open the project the run started in and the card also offers Apply, which drops the image into Your generations where a normal run would have put it. The card is not kept: download it before the ✕ in its corner discards it.
Your generations
Every scene you roll stacks into a grid under the Generate button, newest first, with a running count in the Your generations heading. The 24 most recent are kept, and they are stored with your project, so a saved project brings its stack back when you reload. Comparing them and committing one is free — the credits went at Generate time.
- Thumbnail — click one to preview it large on the left. A fuchsia border marks the selected thumbnail; hovering one shows the prompt that made it.
Restore this prompt— the clipboard icon at the bottom of a thumbnail. It copies that result's prompt back into the prompt box, ready to tweak and re-roll.Save (download + keep in project)— the download icon beside it. It downloads the PNG immediately and, when you are signed in and the work is in a saved project, also keeps it in that project's saved images. A green✓in a thumbnail's corner marks a result already saved that way.Use this image— under the large preview on the left. It commits the previewed generation as your working image and flips the right panel toSource Art Review. The generate controls go with it, so rolling more scenes after that means starting over with↺ Replace image.Upload a PNG / JPG / PSD— once at least one generation exists, anor upload your owndivider adds a second upload button to the panel, for when you would rather drop the rolls and use your own file after all. The line under it readsA layered PSD becomes sprites (one per layer, no AI) and opens Finish Sprites.— a.psdor.psbpicked here behaves exactly like the dropzone: every layer becomes a sprite, no AI runs, and you land on Step 5 · Finish Sprites.
Tip. Credits are spent when you press Generate, never when you commit — so roll two or three candidates, click through them in the grid, and only then press Use this image on the one you want.
Pixel art, and what the detector decides
There is no style switch to get wrong: Pixploder works in pixel art on every project. Prompts for new art carry a fixed pixel-art instruction, art the editor scales up is stepped up nearest-neighbor rather than blurred, mask cut-outs come out hard-edged rather than feathered, and every export declares crisp nearest texture filtering.
A local detector still reads your art the moment it lands — upload, generation, or PSD import — and it still picks two starting points for you. Both are ordinary settings from then on, changed on the step that owns them:
★ Repixelizeon Step 7 · Final Polish starts switched on when your art reads as pixel art — a measured grid, hard 1:1 pixels with no anti-aliasing, or the grid-less pixel-art look — and off when it does not. That is the pass that bakes the whole scene back onto a grid at a size you choose.- The keyer's
Soft edgesswitch on Step 5 · Finish Sprites starts off for art that reads as pixel art — the hard, on-or-off silhouette — and on, with a light feather, for art that does not, so a smooth-edged upload is not cut into ragged alpha on the first pass.
The same reading decides one thing that is not a starting point, because it has no dial at all: the shadow block size on Step 6 · Add Shadows is the pixel cell the detector measured, clamped to 8 px — art drawn at 2 px cells casts 2 px shadow blocks — and when there is no cell to read the block is simply native, 1 px, whatever size the document is. That one is re-measured from your art every time a source canvas is installed, including on project load, so it is the same number today and next week.
The verdict itself is not written down anywhere in the interface, and it is not stored with the project; the two settings it seeded are, and they are yours from the first time you touch them.
Source Art Review
Once an image is in — uploaded, or generated and committed with Use this image — the right panel becomes Source Art Review and the left pane shows your source on an alpha checkerboard, under the line Check the art you're about to cut up. Scroll to zoom · middle-drag, right-drag or Alt+drag to pan. The % chip at the top right of that pane reports the zoom and resets both zoom and pan when clicked.
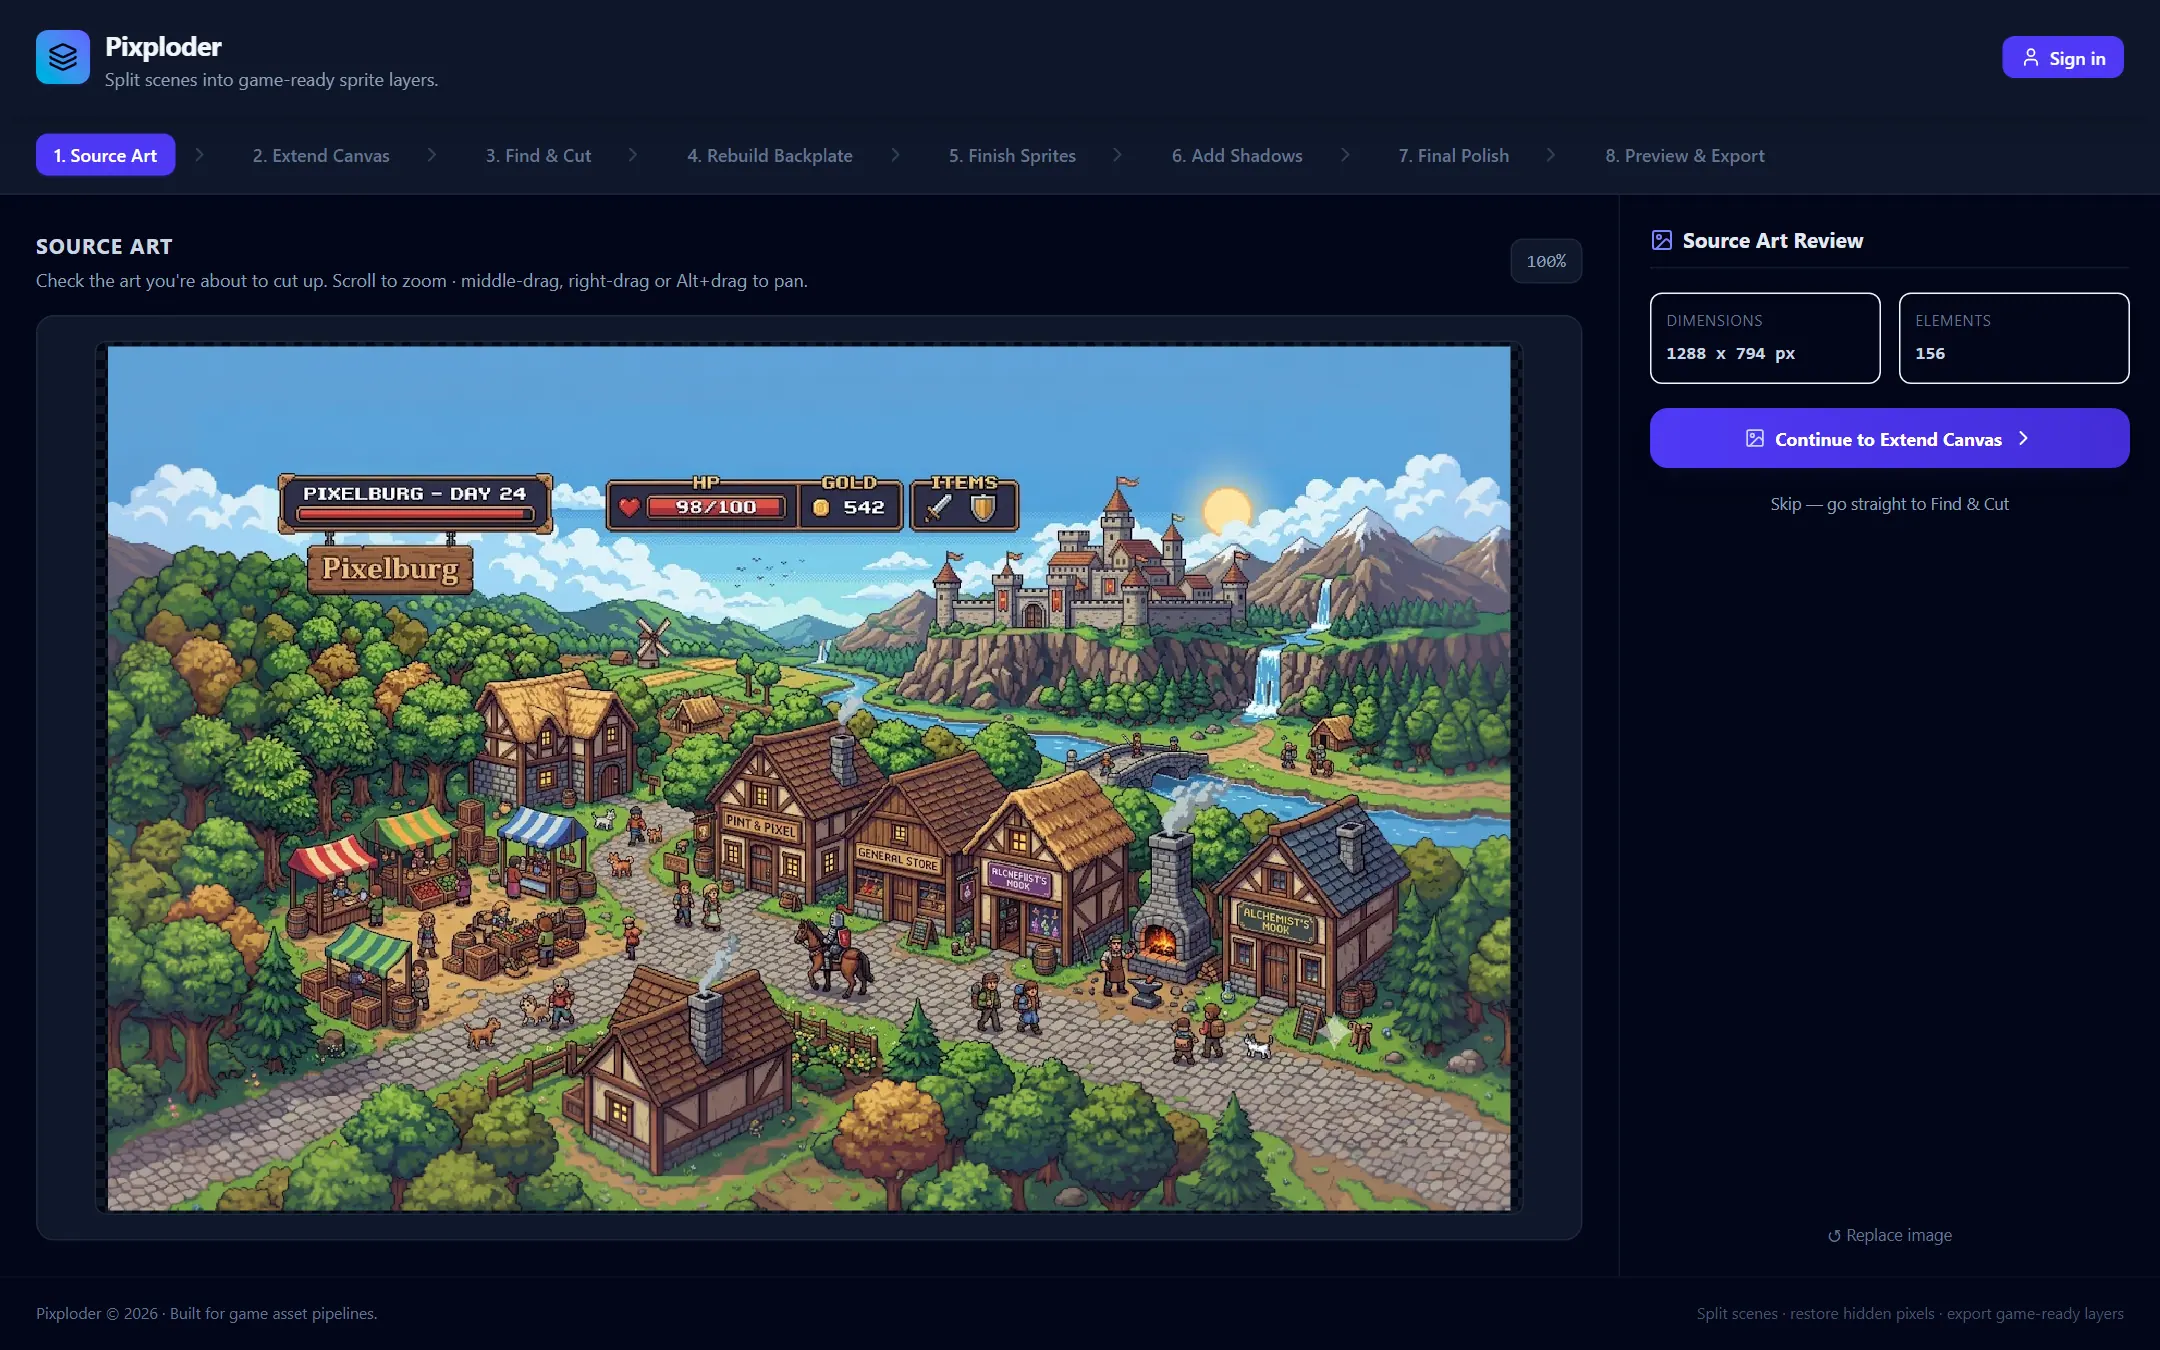
Dimensions— the source pixel size, written asW x H px.Elements— how many elements the project holds. It readsUncalculatedwhile there are none, so a fresh upload or generation showsUncalculateduntil Step 3 · Find & Cut finds some — a PSD import arrives with its layers already counted.Continue to Extend Canvas— the main button; moves you to Step 2 · Extend Canvas.Skip — go straight to Find & Cut— jumps past extending to Step 3 · Find & Cut. Use it when the scene is already framed the way you want it.↺ Replace image— at the bottom of the panel, starts the project over. It is the only control that wipes this project's work back to a blank Step 1, and it lives only here.
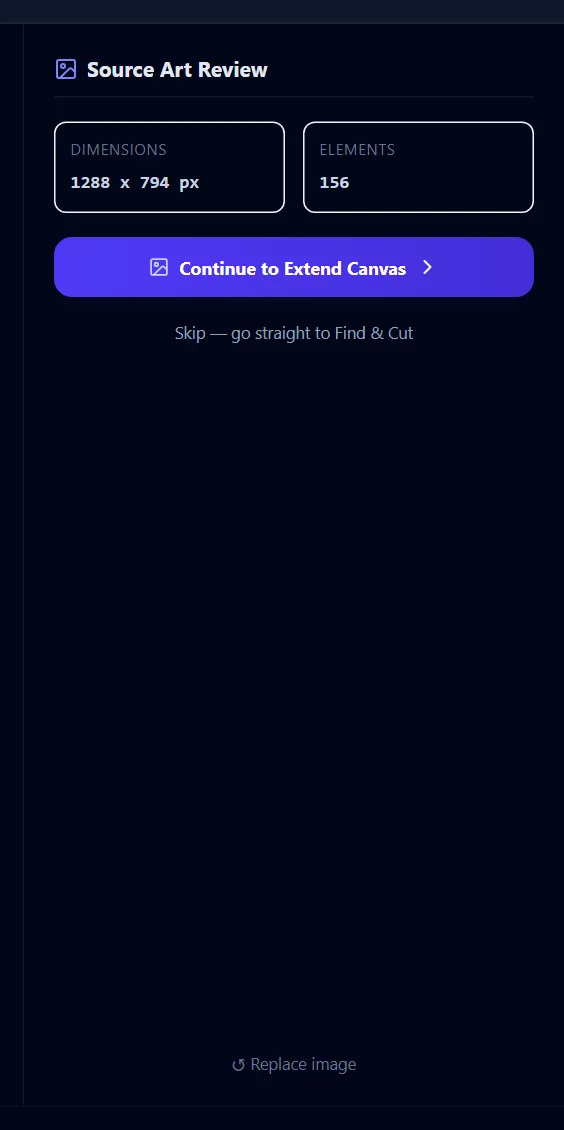
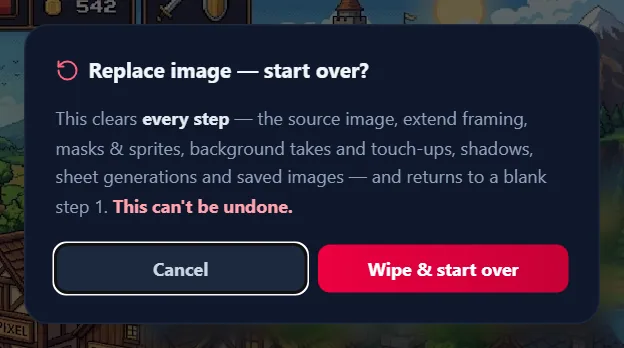
Careful. ↺ Replace image opens Replace image — start over?, and confirming it clears every step — the dialog names the source image, extend framing, masks and sprites, background takes and touch-ups, shadows, sheet generations and saved images, and your stack of generations goes with them. It cannot be undone, and if the work is in a saved project, that project is overwritten with the blank state right afterwards (an amber line names it so you know which one). The buttons are Cancel and Wipe & start over.
With a working image committed, Continue to Extend Canvas carries the scene into Step 2 · Extend Canvas — or Skip straight to segmenting when the framing already fits.