Step 7 · Final Polish
Step 6 · Add Shadows grounds your sprites; Step 7 · Final Polish is the last pass before the scene is handed to Step 8 and your exports. One panel does two jobs, and both are optional. It repixelizes the whole scene — background, layers, and every sprite — onto a true pixel grid at a resolution you pick, and it snaps that scene onto a palette you imported. A live Final Polish Preview fills the left of the panel; two stacked racks on the right hold the transform and the palette snap. Nothing applies while you sit on the step — there is no Apply button. Both run the moment you enter Step 8 · Preview & Export, and the diorama and every export ride on the result. You are done when you have chosen an output resolution — or switched the transform off — and, if you are snapping, the palette you want to bake is the active one.
Costs. Nothing on this step spends credits and no AI runs — not while you tune, and not at the bake. Repixelize is a canvas resample and the palette snap is a color lookup, both computed in your browser. Palette images are decoded locally and never uploaded. Preview as often as you like; the balance never moves. See Credits & plans.
The preview and its toolbar
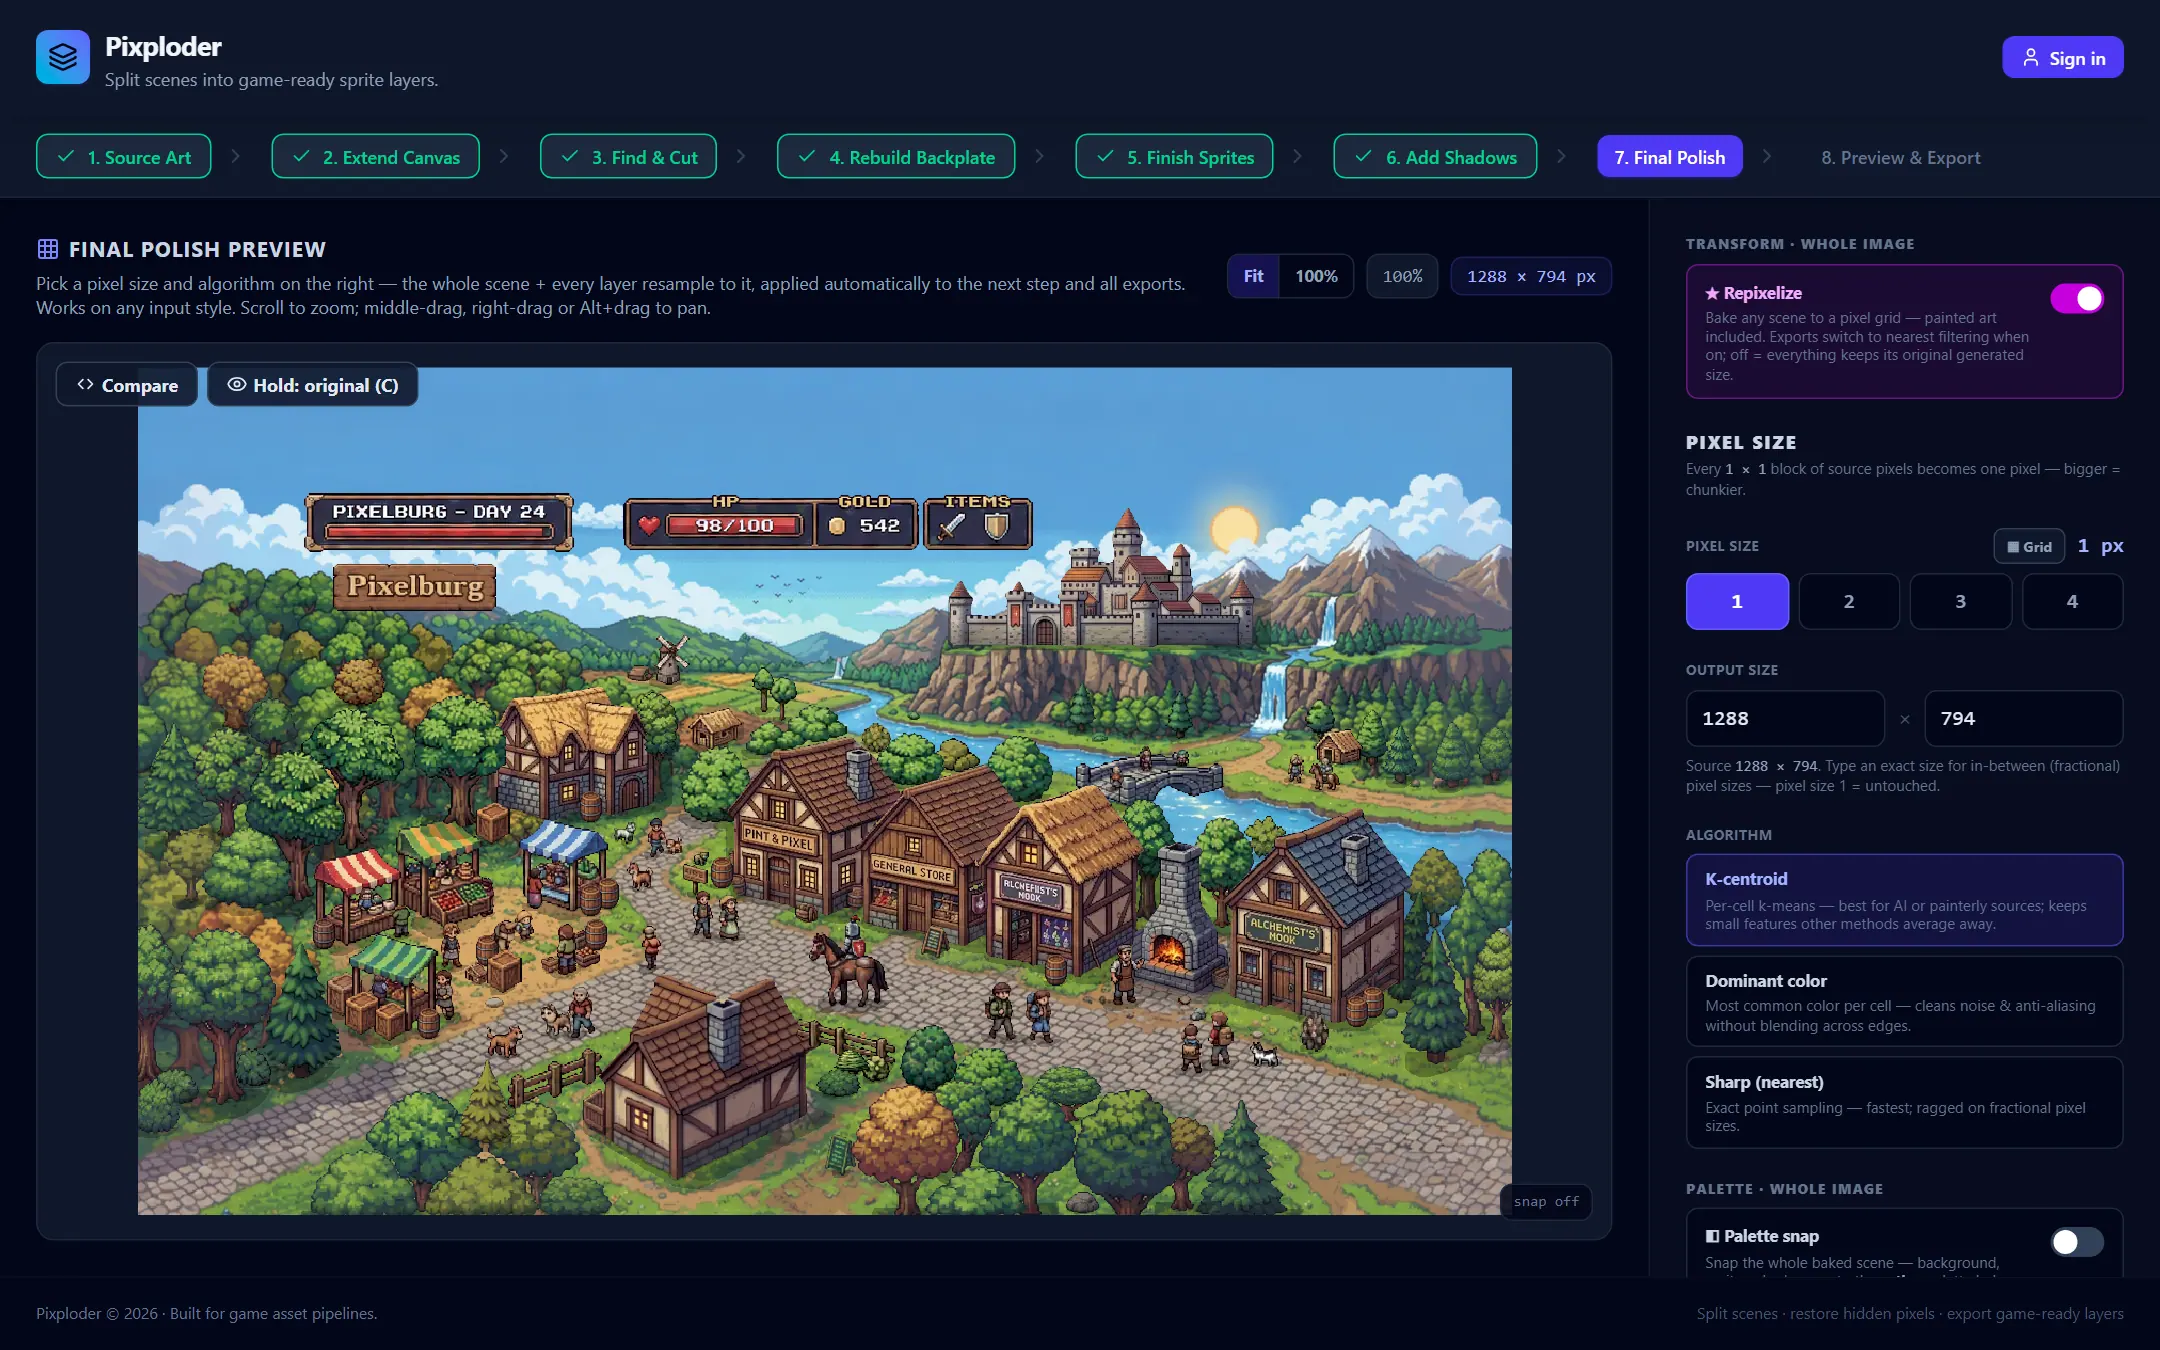
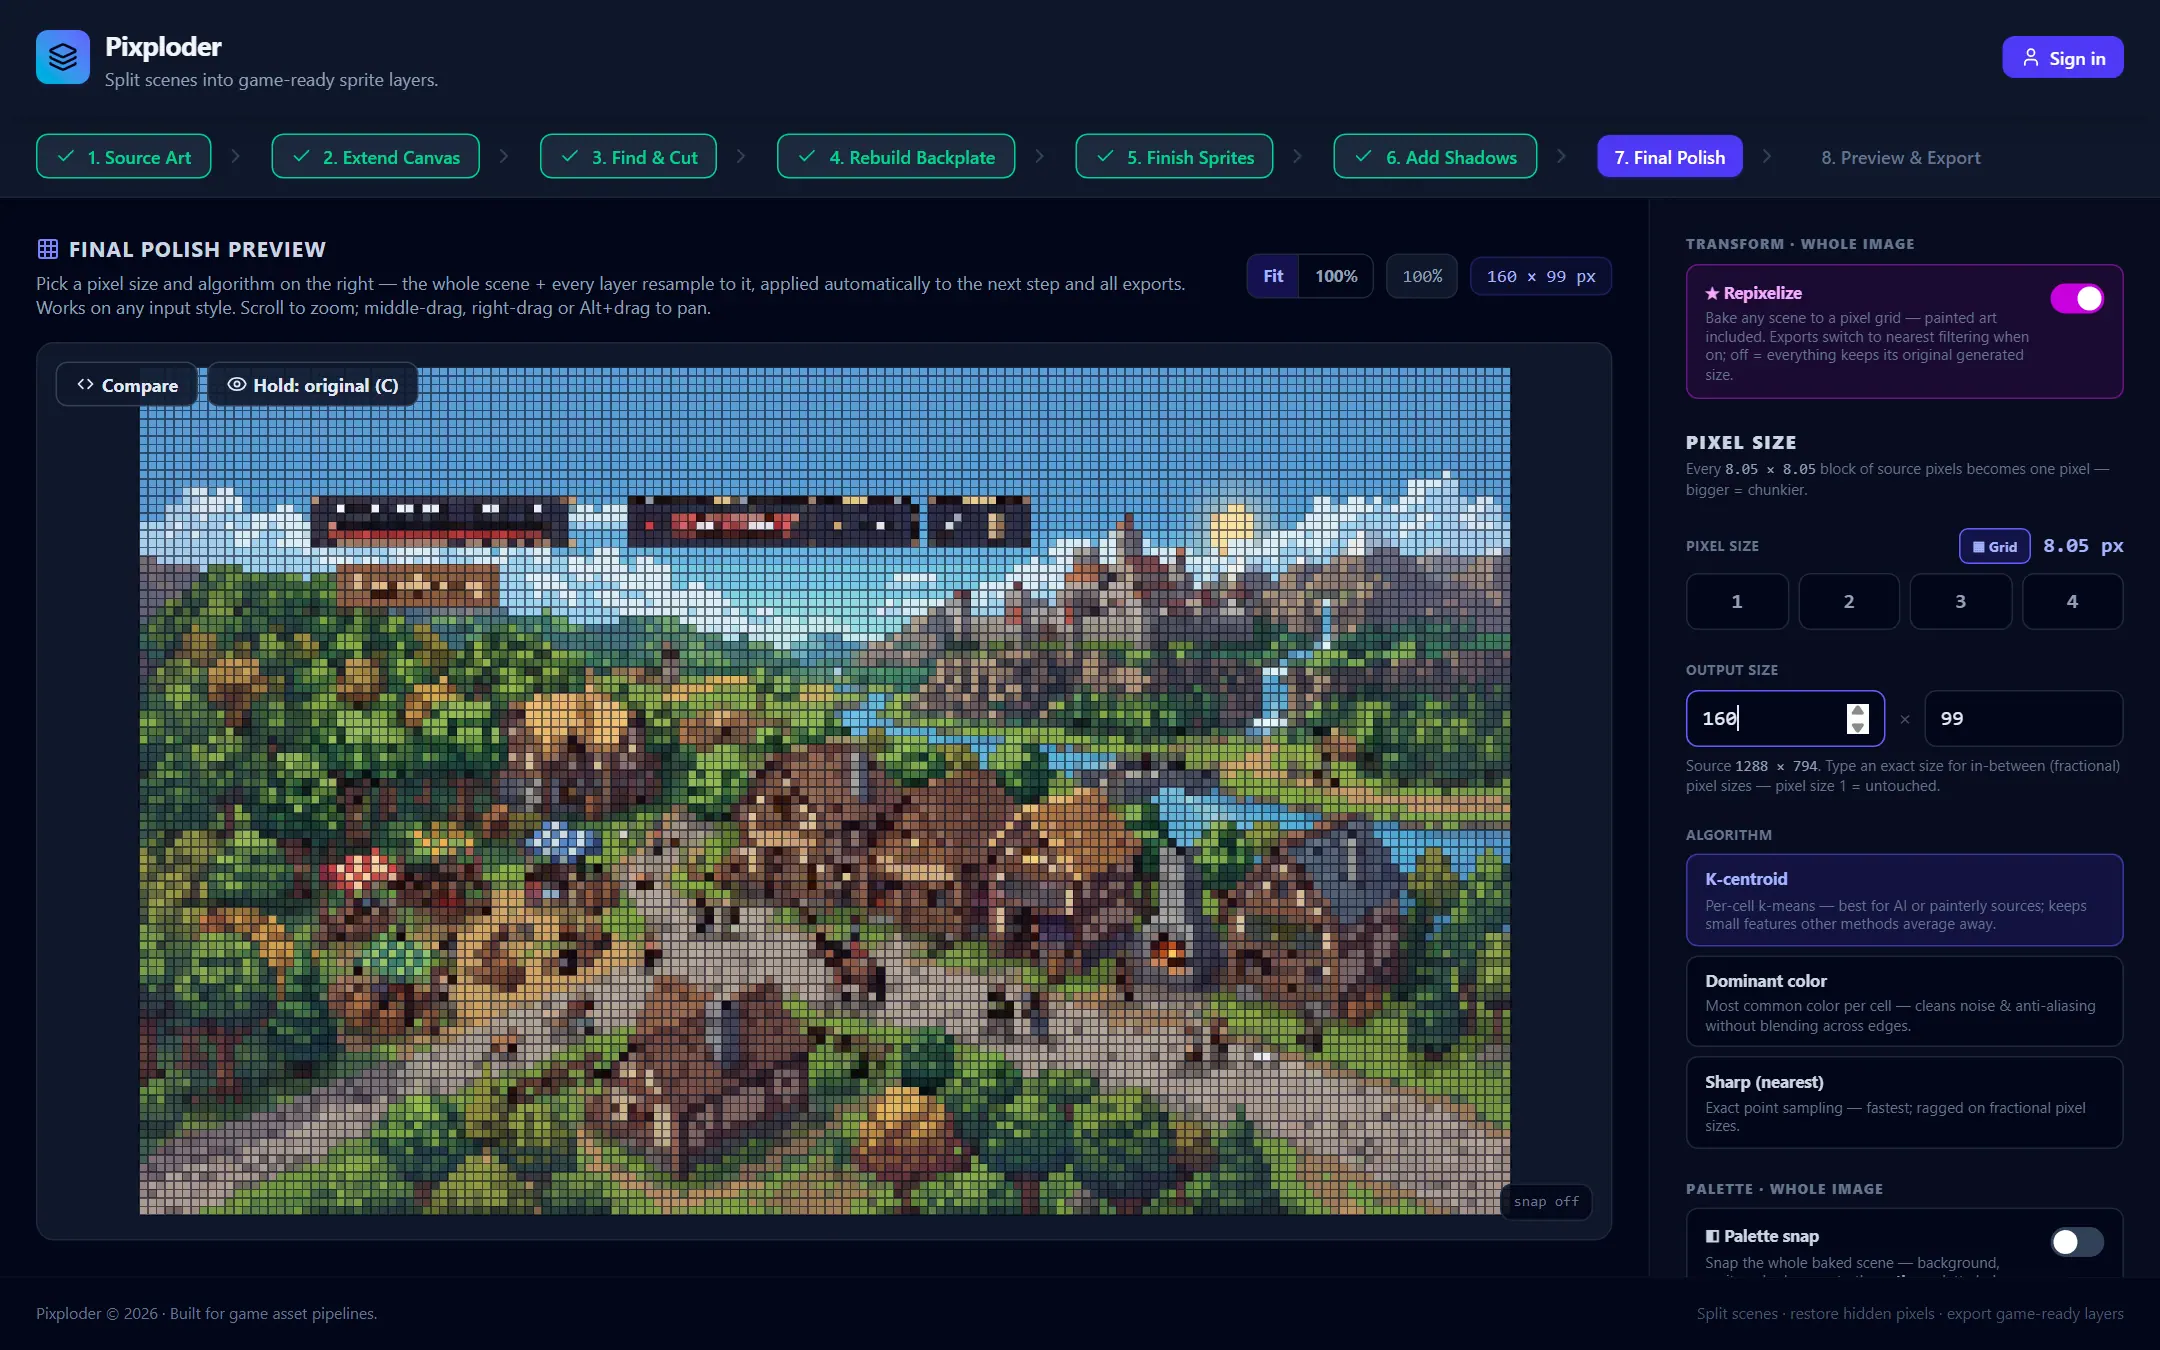
The left pane, headed Final Polish Preview, is a zoomable render of the whole staged scene — the background, every visible sprite, and the shadows from Step 6 · Add Shadows — resampled at the current output resolution. It re-renders on its own whenever you change the pixel size, the output size, the algorithm, the ★ Repixelize switch, or anything in the palette rack — including which palette is active: a small updating chip appears in the top-right corner while the new resample computes, and Rendering preview… shows before the first frame lands. The exact CIEDE2000 color match gets a chip of its own — CIEDE2000 · {n}%, in the bottom-left corner — because it is the one pass slow enough to be worth watching. The image is drawn pixelated so you can inspect the real grid, and the alpha checkerboard shows through wherever the scene is transparent.
The line under the heading tells you what the pass will do. With the transform on it reads Pick a pixel size and algorithm on the right — the whole scene + every layer resample to it, applied automatically to the next step and all exports. Works on any input style. Scroll to zoom; middle-drag, right-drag or Alt+drag to pan.; with it off it switches to Repixelize is OFF — everything keeps its original generated size. Turn the pass on to bake any scene (painted art included) to a pixel grid. Scroll to zoom; middle-drag, right-drag or Alt+drag to pan.
The view controls sit in the header, in this order:
Fit— resets zoom and pan so the whole scene sits as large as the panel allows. It lights up while you are already fitted, and its tooltip repeats the rule that trips people up:Pixel size changes the pixels, never the preview's size on screen.The preview box is fixed, so a coarser pixel size only makes the pixels inside it chunkier.100%— zooms so one output pixel covers one screen pixel. This is the button that does followPixel size, and it is how you check the true grid after a resample. On a target larger than 1,600 pixels on its long side the preview is a reduced copy, and the button says so — it then means one preview pixel per screen pixel.- The
{n}%chip — prints the current zoom, and clicking it resets zoom and pan back to the fitted view, exactly likeFit. - The
{W} × {H} pxbadge — a read-only readout of the resolution the step will produce: your chosen target when the transform is on, the source size when it is off.
Zoom and pan work the same as every other canvas: scroll to zoom at the cursor (50% to 1000%), and middle-drag, right-drag, or Alt + left-drag to pan. See Keyboard & pointer.
Two floating buttons sit in the top-left corner of the preview once the first frame has rendered, the same pair Steps 4, 5, 6 and 8 carry:
Hold: original (C)shows the original image — the same baseline Step 4 compares against — for as long as you hold the button, or the C key, and releases the moment you let go.Comparewipes between the two: the original stays left of a white divider, the polished preview right of it, so the wipe answers what has the whole pipeline done to my picture. Press anywhere over the image with the left button to jump the divider there, then drag it; middle-drag, right-drag and Alt-drag still pan.
Transform — bake to a pixel grid
The upper rack, Transform · whole image, resamples the entire scene onto a resolution you choose, committing one hard color per output pixel so the result stays crisp where an ordinary filter would blur it.
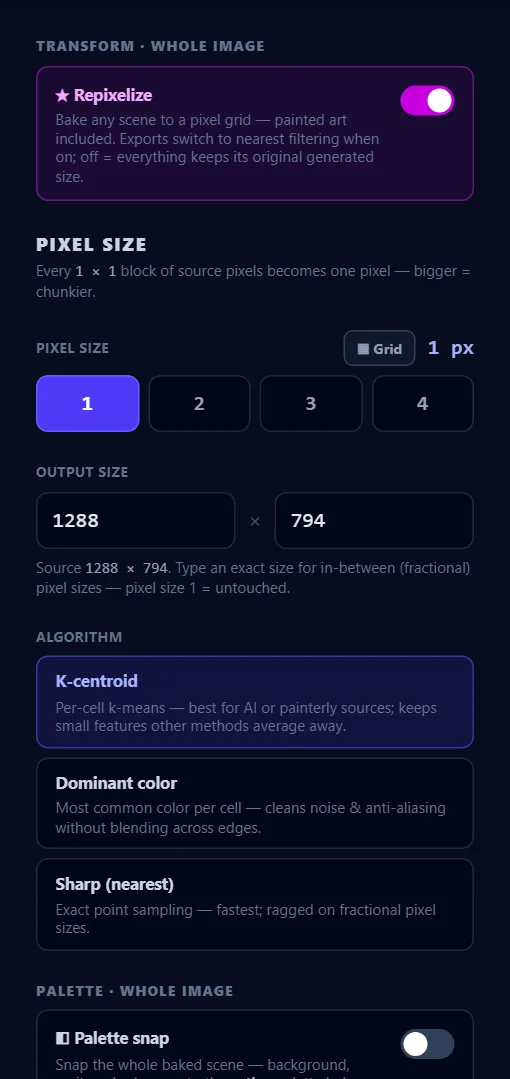
★ Repixelize— the master switch, described in the panel asBake any scene to a pixel grid — painted art included. Exports switch to nearest filtering when on; off = everything keeps its original generated size.It is the one place the older name survives — the step timeline, the panel heading andContinue to Final Polishon Step 6 · Add Shadows all sayFinal Polish, while the switch is named for the job it does rather than for the step it sits on. Its starting position follows the grid detector that read your art at Step 1 · Source Art — on when the probe found pixel art, off when it did not — and you can override it here at any time. A project started from scratch begins with the pass on. Switching it off collapses the whole size-and-algorithm section below.▦ Grid— the small toggle at the right of thePixel sizeheading draws the output pixel grid over the preview, one cell per output pixel, so you can see the lattice the bake will commit to (for targets past the 1,600-pixel preview cap the preview is a reduced copy, and one cell is one preview pixel). It is display-only: nothing it does reaches a bake or an export. The overlay hides itself when a cell would come out under 3 screen pixels, so zoom in if the grid does not appear.Pixel size— the block under the heading spells out the arithmetic:Every {n} × {n} block of source pixels becomes one pixel — bigger = chunkier.The row beneath repeats the current value as{n} px.- The
1/2/3/4presets — four buttons that set the output to the source divided by that number. The one matching the current output size stays highlighted.1means output equals source, so nothing is resampled. Output size— two directly editable fields, width×height. The aspect ratio is locked, so editing one side rewrites the other, and both are capped at the source dimensions: this step only ever downsamples. The line under them confirms your source size and adds the reason to type here —Type an exact size for in-between (fractional) pixel sizes — pixel size 1 = untouched.Typing an exact size is the only way to reach a fractional pixel size such as4.48; the preset buttons are whole numbers only, and the row then prints the real ratio —8.05 px, not a rounded8.Algorithm— how each output pixel's color is committed from the source pixels underneath it.K-centroidandDominant colorweigh each source pixel by how much of the output cell it actually covers, which is what keeps a fractional pixel size exact;Sharp (nearest)point-samples instead, and its own description says so.
| Button | What it commits | Best for |
|---|---|---|
K-centroid | Per-cell k-means; the heaviest cluster's color wins | The default — AI or painterly sources, because it keeps small features other methods average away |
Dominant color | The most common color in the cell | Cleaning noise and anti-aliasing without blending across edges |
Sharp (nearest) | Exact point sampling | Speed; it is the fastest, and ragged on fractional pixel sizes |
Careful. K-centroid and Dominant color commit hard alpha: each output cell comes out either fully opaque or fully transparent, whichever wins the coverage. That is what keeps a pixel grid clean, but it does square off soft, feathered sprite edges — Sharp (nearest) is the one that copies whatever alpha it samples. And because the fields cap at the source size, you cannot use this step to enlarge a scene.
Note. Texture filtering is not a decision this switch makes. Pixploder works in pixel art on every project, so every export declares crisp nearest-neighbor filtering whether the transform ran or not.
Palette snap — the whole scene on one palette
The lower rack, Palette · whole image, puts the finished scene on a palette you import. A palette here is simply an image: drop in a palette strip, a sheet you downloaded, or a screenshot of art whose colors you want, and every unique opaque color in it becomes an entry — up to a ceiling described below that only a picture ever reaches. The snap then rewrites the background, every sprite, and the shadow ink to the nearest entry of the active palette. It runs after the transform above it, and that order is deliberate: snapping first and resampling second would let K-centroid average snapped colors straight back off the palette. Alpha is never touched, so the edges you keyed at Step 5 · Finish Sprites come through exactly as they were.
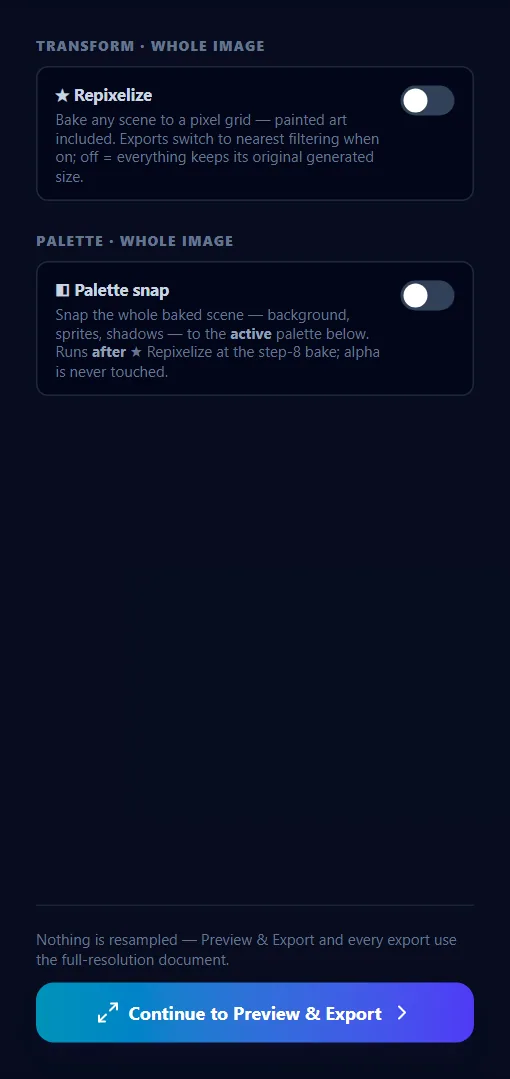
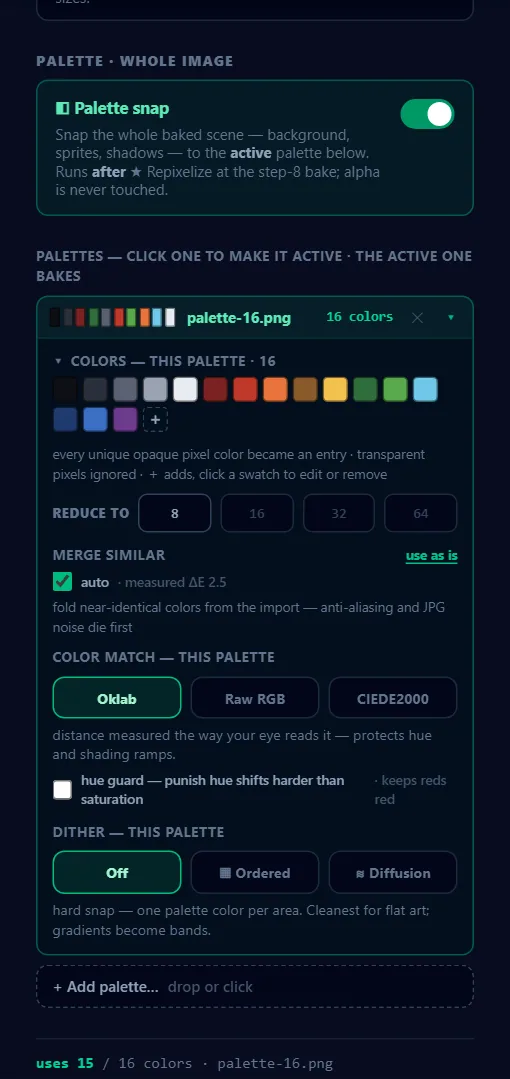
◧ Palette snap— the master switch, described in the panel asSnap the whole baked scene — background, sprites, shadows — to the active palette below. Runs after ★ Repixelize at the step-8 bake; alpha is never touched.Like★ Repixelizeit gates its own rack: switch it off and everything under the card collapses away, so the rail stays short when you are not snapping. It also fails closed — armed with no palette loaded it does nothing at all and says so in amber:Import a palette above to arm the snap — nothing changes until one is loaded.Import palette…— the dashed zone you land on with an empty list, under the two linesany image works — every unique color in it becomes a palette entryandPNG · GIF · JPG · drop one or more here, or click. Click it, or drop files on it; a multi-file drop adds one palette per file, in file order, and the newest becomes active. Pixels that are less than half opaque are ignored, so a palette PNG with a transparent margin reads clean. A file that will not decode as an image, one with no opaque pixels in it, and one that holds a single color are each refused by name and skipped, and the rest of the drop still lands. An image over 2,048 pixels on its long side is scaled down (without smoothing, so no color is invented) before its colors are read, and a palette stores at most 4,096 entries — far more than any real palette holds, and a ceiling only a photograph or a screenshot ever reaches. Past it the import stops keeping the most-used colors, because in a picture the most-used colors are thousands of near-identical background tones and every saturated accent — a torch, a magenta staff, blue armor — sits below that cut. It covers the range of colors instead: the image's colors are sorted into fine shade bins, every occupied bin contributes one real color out of the image — its most-used member, carrying that whole bin's pixel count — and if there are still more bins than the ceiling, the heaviest bins win. A torch's few hundred pixels then compete against a few thousand bins rather than against a million background pixels, so rare accents come through the import instead of being dropped before you ever see them. The price is one entry per bin: two shades a hair apart arrive as one, which on a screenshot is the trade you want.- The palette list — one row per import, headed
palettes — click one to make it active · the active one bakes. Each row shows a ten-tile strip sampled evenly across the palette's lightness range so two palettes are told apart at a glance, then the file's name — with a dim·editedafter it once you have changed that palette's colors by hand — and its color count. Clicking a row makes that palette active and the preview re-snaps immediately, which turns clicking between rows into a live A/B of palettes.✕removes a row — removing the active one activates its neighbor, and removing the last one brings the import zone back.▾/▸on the active row folds its settings away and back.+ Add palette…under the list adds more; the rack holds up to eight palettes at a time and says so if you try for a ninth. - The color count —
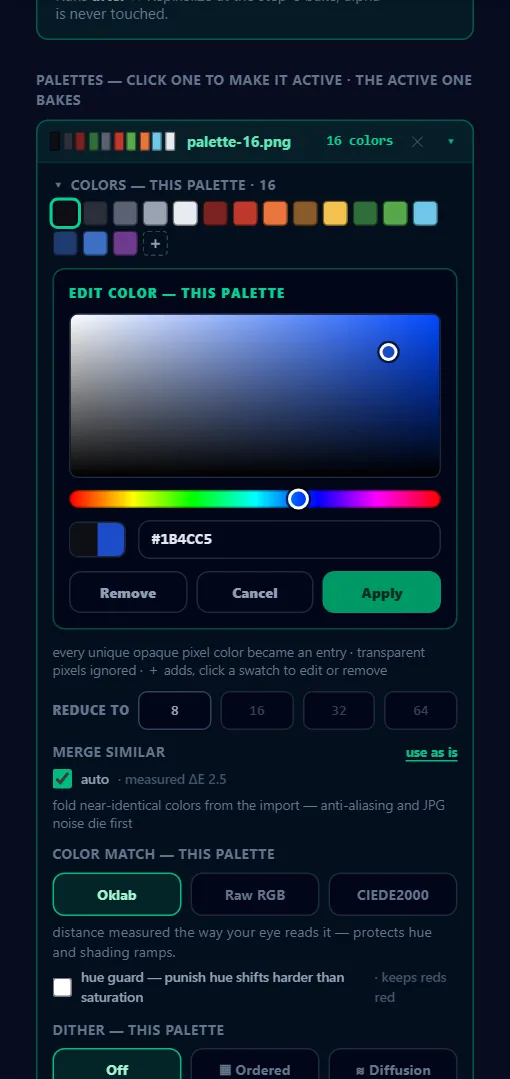
16 colorson a clean import. Whenever the palette ends up holding fewer colors than the image did, the row prints raw → effective instead, as1,847 → 16: on the left what was actually in the image, on the right what the snap uses. The merge below is the usual reason; a reduce prints the same pair, and so does an import that ran into the 4,096-entry ceiling. The number on the left always stays what the image held. Colors — this palette · {n}— the palette's own color list, first in the expanded row and folded away by its own▾/▸. It arrives open on a palette of 64 entries or fewer and collapsed on anything larger, because on a photo crop the count in the header is the only useful thing to say. Open on a small palette it shows every entry as a swatch and a+tile at the end. The swatches are laid out the way a pixel-art palette is written: the neutrals first — black through the grays to white, as one ramp — then the colors grouped into families and each family shaded dark to light, so a shading ramp reads as a ramp instead of being scattered through the grid. That layout is a view. The palette's own order underneath is the one the import fixed and it never moves, which is why nothing re-bakes when the grid re-files a swatch, and why a color you add with+appears in its family straight away rather than tacked on at the end. A swatch's tooltip prints its hex; clicking it opens the picker on that entry, and+opens the same picker on a new one.- The browse grid — past 64 entries the grid becomes a short scroll box holding the 256 most frequent entries, laid out in the same neutrals-then-families order so a big import is legible at all, with a
+{n}chip counting whatever sits past that cap.+is hidden here, because a color appended past the 256-entry window would land where you could not see or edit it — reduce first. Which 256 you see is still decided by usage, not by color; only the arrangement is perceptual. Each swatch still carries its real place in the palette, so clicking one edits that entry and not the one that happens to sit beside it on screen. - The color picker — opens inline inside the
Colorssection, headedAdd color — this paletteorEdit color — this palette: a saturation/value square, a hue bar under it, then a preview swatch and a hex field. Type#RRGGBB(or the three-digit short form) into the field and press Enter or click away to jump the picker to it; text that is not a color simply reverts. While you are editing an entry the swatch is split, the color the palette holds today on the left and the one you are picking on the right. Nothing in the palette moves until you commit —Add colorappends a new entry,Applyreplaces the one you opened,Removedeletes it, andCancelor Esc leaves everything as it was. Two refusals keep a palette usable: it never drops under two entries (Keep at least 2 colors in a palette.), and a color the palette already holds is refused rather than added twice —That color is already in this palette — every entry is a different color.Every commit lands immediately: the preview re-snaps, and the row's strip and count follow it. reduce to8163264— the tool a thousand-color import actually needs, and it is offered on any palette bigger than eight colors rather than only on the huge ones: the row sits under the color grid from nine entries up, outside the collapsible so a busy import that arrived folded can still reach it in one click. It stays after a reduce, so you can come down from 64 to 16 and then to 8 without starting over — and back up again, because every press re-clusters the stored import rather than the short list in front of it. A size is grayed out exactly when pressing it would hand you the list you already have: on a palette you have not reduced that is every size from its own count upward, and on one you have it is only the size it is sitting on. A disabled button explains itself better than a button that looks like it did nothing. It is not a blind cut. It folds perceptually near-identical entries first, at whatever radius that palette'smerge similaris set to, then clusters what is left by how much of the palette image actually used each color, so anti-aliasing and JPG noise die before a rare accent does. Where one color clearly dominates its cluster it survives exactly, byte for byte, instead of being averaged into a color the image never held. The reduce lands in place on that palette, and the note under the grid stops crediting the merge for the result and says what actually happened:reduced to {n} — restore brings back the import. Hand edits work the same way — once you change a swatch the note readsedited by hand — restore brings back the importinstead of crediting anti-aliasing for a color you deleted yourself. A reduce re-derives everything from the stored import, so it replaces any hand edits and says so out loud:Reduced from the original import — hand edits were replaced.restore— the way back from both of those. It appears in theColorssection, with the list open, as soon as a palette has been hand-edited or reduced, and it rebuilds the import: the full color list at that palette's currentmerge similarradius, with the·editedbadge and the reduced state cleared. Every palette keeps its source colors in the project file, sorestorestill works on a project you reopen next week.merge similar— how hard near-identical entries are folded together, described asfold near-identical colors from the import — anti-aliasing and JPG noise die first.auto · measured ΔE 2.5is checked by default and uses that measured distance, which merges the noise and nothing else. Uncheck it and aradiusslider from 0 to 8 in steps of 0.5 appears, where 0 merges nothing and keeps every color the import kept — which is every unique color in the image up to the 4,096-entry ceiling, and one color per fine shade bin past it. Moving the slider re-derives the effective list from the palette's stored source colors and rewrites the count on the row, so you can watch a JPG screenshot collapse from four figures to a workable set. A radius that would fold a palette below two entries is refused rather than applied: the slider comes to rest on the strongest merge that still leaves a palette and says which one —Merging that hard would leave under two colors — settled at radius {n}.Because it always re-derives from that stored source, it also replaces hand edits and any reduce, and it says so out loud when it does:Re-merged from the original import — hand edits and reduce were replaced.Read it as a re-import rather than an undo — a reduce you were happy with does not survive a nudge of this slider. This is the control that turns an anti-aliased sheet into a real palette. One honest limit: near-black tones sit perceptually far apart even when their bytes are close, so a noisy import may keep an extra shadow entry or two at max merge — they are legitimate snap targets, not a defect.use as is— the one-click way to keep the import whole, at the right-hand end of themerge similarheading for the times you do not want anything folded at all. It unticksauto, drops the radius to0, and re-derives on the spot, so the answer to "I want the colors that are in my image" is one click instead of a checkbox and a slider dragged to the floor. Its tooltip is honest about what as is can mean, because that depends on what you imported —Keep every color the import kept, merging nothing — up to the 4,096-entry ceiling; a bigger image already arrived as one color per fine shade bin. A palette sheet, or any image holding 4,096 unique colors or fewer, comes through with literally every one of them; a bigger import comes through at one color per fine shade bin, which is why a screenshot's rare accents survive it while its thousand near-identical browns do not each get an entry. The row still printsraw → effectivewhenever the palette holds fewer colors than the image did, so the difference is on screen rather than implied. It is the same re-derive the slider performs, which means it comes with the same caveat: on a palette you have edited or reduced it replaces that work and says so in the same notice. Two practical notes: a palette that size is slower to snap than a sixteen-color one, but far less so than the entry count suggests, becauseOklabandRaw RGBswitch to a pruned search that returns exactly the same colors; andCIEDE2000is the one match likely to refuse it on a large scene, since its gate multiplies your scene's colors by the palette's entries. If the full set turns out to be more than you wanted,reduce tois a few rows up in theColorssection.Color match — this palette— how nearest is measured, stored per palette like every setting under this row.Oklab, the default, measuresdistance measured the way your eye reads it — protects hue and shading ramps.Raw RGBmeasuresplain numeric distance in sRGB — the classic look; can drift hue on small palettes.CIEDE2000is the exact color-difference formula the color industry standardized on, and the most faithful of the three where hue is concerned — it is also by far the slowest, so it arrives with a gate of its own, two items down.hue guard — punish hue shifts harder than saturation— a checkbox that appears underOklabonly, off by default, with a dim· keeps reds redbeside it. It bends the same Oklab measurement rather than replacing it: a miss in saturation counts for a quarter and a miss in hue counts double, so a red with no red in the palette lands on a duller red instead of on a brown of the same weight. Reach for it when a hue drifts on a stubborn palette.Raw RGBdeliberately has no extras, andCIEDE2000already carries a stronger hue weighting inside its own formula, so neither shows the box.- What
CIEDE2000costs, and the gate in front of it — the exact formula is roughly sixty times the work ofOklabper color, so the choice is priced before it is armed. Pixploder counts the job on the scene as it stands — the distinct colors in it multiplied by the entries in the palette — and does one of three things with the answer. A small job computes silently, exactly like the other two matches: a repixelized 480 × 270 scene on a 32-color palette is a fraction of a second. A middling job — the same palette on a full-resolution 1920 × 1080 painted scene is a few seconds on a typical desktop — computes in slices, with aCIEDE2000 · 43%chip counting up in the bottom-left corner of the preview while the stamp readssnapping · {name}and the picture you already had stays on screen; when it lands, the chip goes and the stamp flips tosnapped · {name}. Touch anything while it runs — another palette, another setting, an edited color — and the half-finished job is abandoned rather than painted. A job past the ceiling — that same full-resolution scene against a 256-entry palette, for instance — is refused outright: the selection never leaves the match you already had, and a notice says what to do about it —This scene has too many colors for the exact match — turn on ★ Repixelize or reduce the palette.Both of those work, because each shrinks one side of that multiplication. The count is taken when you pick the match, on the scene in front of you; arm it on a small job and it stays armed, and the bake then honors it in slices — slow on a big scene, but never frozen. If a laterrestoreor a lighter merge grows the palette past what the gate approved, the match falls back toOklaband says so. Dither — this palette— whether the snap may mix two palette colors to stand in for one it does not have.Offis the default and commitsone palette color per area.▦ Orderedand≋ Diffusionare the two ways to get more out of a small palette, and the table below says which to reach for. Dithering is the honest answer to "use as many of my colors as possible" — a hard snap collapses a gradient onto a handful of entries, and turning a dither on is what makes the rest of them appear.- The dither extras — each mode carries one quality control and a
strengthslider, 10% to 100% and 80% until you move it, printed as{n}%beside its track. Under▦ Ordered,auto strength — fit the pattern to this palette's spacing · measured sweet spotis on by default and fits the pattern's amplitude to the gaps in your own palette, because one fixed strength over-dithers a dense palette and under-dithers a sparse one; unticking it reveals the slider so you can drive it by hand. Under≋ Diffusion,protect flat areas & outlines · sprites never shredis on by default and makes flat runs and one-pixel outlines snap exactly with no error spread — and the strength slider is always there, damping how much error is carried onward. One value serves both modes, so switching between them carries the number you already tuned. - When the dither decides for itself — two automatic touches sit on top of that control, and neither one overwrites a setting you made. A palette imported while
★ Repixelizeis off — the painted and photographic case — arrives set to≋ Diffusionat 70%, because a gradient-heavy source is exactly what needs it; a palette imported while★ Repixelizeis on arrives atOff, because a pixel-art scene wants hard colors. That applies to newly imported palettes only; a palette already in the list keeps whatever you tuned. The second touch runs at every render, on palettes of 64 entries or fewer: when the palette turns out to already be the scene's palette — fewer than 5% of the opaque pixels sit farther than roughly ΔE 2 from their nearest entry — the preview and the bake both snap with the dither off, and the usage readout says so by appending— palette matches the art, dithering skipped. A bigger palette is a raw import, where the dither is the point, so the test is not run on one at all. YourDitherchoice is not rewritten; it simply has nothing to do while the palette matches, and it returns the moment the art or the palette moves away. The test is perceptual rather than numeric, which has one visible consequence: near black the eye reads finer than the 8-bit steps do, so art that misses a black entry by a single code still counts as needing the dither. uses {n} / {n} colors · {name}— the readout at the foot of the rack, with a thin bar beside it, recomputed from the live preview: how many distinct palette entries the scene actually landed on, out of how many the active palette holds. When two or more entries go unused it appends the reason —— {n} unused, nothing in the scene is close to them. Treat it as a diagnostic, never a target: a low count is often the correct answer for flat art, and nothing about it blocks a bake. Ause as isimport makes the gap dramatic and still harmless — a palette carrying every shade of a whole screenshot will always hold thousands of entries that no pixel in your scene is nearest to.
| Color match | How it measures nearest | Best for |
|---|---|---|
Oklab | Perceptual distance — hue, chroma and lightness weighted the way your eye reads them | The default, and the right answer unless you have a reason; add hue guard when a hue drifts |
Raw RGB | Plain numeric distance in sRGB | The classic converter look, and matching a tool that measures the same way |
CIEDE2000 | The full CIE color-difference formula | The most faithful hues on a stubborn palette, when you can spend the time it takes |
| Dither | What it does | Best for |
|---|---|---|
Off | Hard snap — one palette color per area | Flat and cel-shaded art, and any palette that already matches the scene; gradients come out as bands |
▦ Ordered | Crosshatch mixing on a fixed lattice | The classic pixel-art shading — stable, tileable, and local, so a sprite dithers the same wherever it sits |
≋ Diffusion | Smooth error spread — the smoothest gradients and an organic grain | Painted and photographic sources; it never spreads error across a transparent gap |
Under the rack, the fine print restates what the snap promises: Only the active palette bakes — the list is for comparing looks and keeping per-palette setups. Deterministic; only pixels with alpha > 0 are snapped; transparent pixels in palette images are ignored. Shadow ink is snapped too, but a translucent shadow is a mix of its ink and the art under it — that blend is off-palette by nature. A small stamp in the preview's bottom-right corner always names the state you are looking at: snapped · {name} while the snap is armed, snapping · {name} while an exact CIEDE2000 match is still computing, holding original while the compare peek is held, and snap off when nothing is armed.
Careful. Snapping constrains the pixels in each layer, not every pixel you will ever see. Shadow ink is snapped like everything else, but shadows draw as translucent ink, so what a shadow composites to over the art beneath it is a blend — and a blend of two palette colors is not itself a palette color. The same goes for any flattened output: the composite.png inside Full-size layers (ZIP), and the PSD's merged composite and its Original scene layer, which are a readback of your untouched source rather than of the snapped stack. The individual layers in every export are on palette, and that half of the promise is not left to trust: an automated gate pushes a snapped scene through the export builders and fails if a single opaque pixel of a per-layer or per-sprite product lands off the palette. One more honest gap: the preview snaps the composed scene in a single pass while the bake snaps each raster on its own, so with a dither on, single pixels can fall differently between the two. The palette and the color families are identical either way — the bake is the truth, and the preview never lies about which colors you are getting. See Export formats.
Careful. CIEDE2000 and ≋ Diffusion together are the one genuinely expensive combination in this panel. Diffusion gives every pixel its own accumulated error, so the match cannot reuse an answer it has already worked out for that color, and a bake takes considerably longer than the estimate that let the match arm in the first place. It never freezes — the bake runs in slices and the tab stays yours throughout — but on a full-resolution painted scene it is worth turning ★ Repixelize on first, which makes both passes cheaper at once.
Continue to Preview & Export
There is no Apply button and no wait on this step. The moment you enter Step 8 — by pressing Continue to Preview & Export, or by clicking the step in the timeline from anywhere — Pixploder runs the ★ Repixelize resample, then the palette snap, and bakes both into the working document. The resample runs only when the transform is on and your target differs from the source, so a project left at pixel size 1 skips it entirely. The snap is independent of it: with ★ Repixelize off, an armed snap still runs, on the full-resolution document — which is the slower case, since a painterly scene at full size has many more pixels to look at than a repixelized one.
The line above the button forecasts exactly that: Applied automatically — the next step and every export use this resolution. Going back from Preview & Export restores the full-resolution document. With the transform off it reads Nothing is resampled — Preview & Export and every export use the full-resolution document. instead, and if you step back onto Step 7 while a bake is still finishing it reads Repixelizing the document…. While the snap is armed, the first two of those gain a clause naming the palette that will bake — , then palette snap (palette-16.png).
The resample re-renders the background, every layer, and every sprite at the new size, and the snap rewrites the colors of whatever came out of it. Neither touches the raw generated variants you chose between at Step 5 — your saved version pick survives both. The two share one snapshot, so the bake is never permanent: going back from Step 8 · Preview & Export restores the pre-bake, full-resolution document with your chosen output size and palette still selected, and re-entering bakes again from your current settings. That holds for a snap-only bake as well, on a project where the transform never ran. Autosave stores the full-resolution document too, so a project you save on Step 8 reopens unbaked and unsnapped — see Projects & autosave.
Because nothing in the bake is random, it is also repeatable: the same project, the same settings, and the same palette produce the same pixels every time you enter Step 8, which is what makes a re-export safe to diff against the last one. CIEDE2000 carries the one footnote worth knowing about that: its formula leans on trigonometry that browsers are allowed to round their own way, so an exact dead heat between two palette entries could in principle be broken differently in a different browser. The same browser always reproduces itself, and Oklab and Raw RGB have no such clause at all.
On Step 8, a fuchsia chip in the preview toolbar records what the bake actually did. It opens with baked · and the filtering your exports will ship, and when a palette was applied it ends with the snap, as · snapped to palette-16.png (16 colors). Hovering it spells the summary out in full. The chip appears only once a bake has actually changed something — a scene left at pixel size 1 with no palette armed shows no chip at all — and Step 8 · Preview & Export reads the rest of it.
Tip. Your output size, the algorithm, and the ★ Repixelize switch itself are saved with the project, so a scene you reopen next week bakes the same way it did today. So is the whole palette rack: every imported palette's colors — the ones you edited by hand included — its name, its own merge, match and dither settings, which one is active, and the master switch. The palette images are not stored — the colors read out of them are, both the effective list and the source it was merged from, which is what lets restore work weeks later — so nothing depends on you keeping the source files around.