Keyboard & pointer
Pixploder has one navigation model that is the same on every canvas, and one rule that makes it work: a plain left-drag always belongs to the step's own tool — draw a box, paint a mask, move a sprite — so moving the view lives on the middle button, the right button, or Alt held with the left. Learn that once and every step handles the same. Everything else on this page is per-surface, and the tables below say exactly which surface each gesture belongs to.
Costs. Nothing on this page spends credits. Zooming, panning, selecting, nudging, painting a mask or a zone, undoing, comparing against the original — all free. Credits go out only when you press an AI button, and each step's guide marks which ones those are. See Credits & plans.
Everywhere — zoom, pan and the stepper
Once a picture is on screen, every step draws it inside the same zoomable viewport, and every one of them answers the same four gestures. Zoom is anchored to the cursor: the image pixel under the pointer stays exactly where it is as you scroll, so aim before you wheel.
| Action | Key or gesture | Where |
|---|---|---|
| Zoom in or out at the cursor | Scroll wheel | Any step's canvas — clamped 0.5×–10×, about 1.15× per notch in and 0.87× out |
| Pan the view | Middle-button drag | Any step's canvas, letterbox included; the browser's middle-click autoscroll is suppressed |
| Pan the view | Right-button drag | Any step's canvas; the context menu is held back for the drag, and a motionless right-click keeps its menu where the platform fires it on release |
| Pan the view | Alt + left-drag | Any step's canvas — the trackpad- and pen-friendly stand-in for the middle button |
| Reset zoom and pan | Click the {NN}% chip | The canvas toolbar on every step |
| Jump to any step | Click a stepper node | The N. Label pills under the header — every node past Step 1 except Step 4 is disabled until an image is loaded |
A press that lands in a text field is never a pan, so right-clicking inside an open rename box gives you the native edit menu instead of dragging the view. Step 1 · Source Art has no zoom until an image is loaded — the upload box is a plain drop target, and dragging a PNG, JPG or layered PSD onto it is the same as clicking it.
The {NN}% chip is titled Reset zoom on most steps, and three surfaces name themselves differently because they reset something extra:
- On Step 5 · Finish Sprites there are two independent zoom states. The scene and the packed-sheet preview share one; the solo single-version preview keeps its own, and the chip's tooltip changes to
Reset the preview's zoomwhile solo is up. - On Step 7 · Final Polish the chip reads
Reset zoom & pan — back to the fitted view, and it is joined by aFit/100%pair.Fitshows the whole scene as large as the panel allows;100%scales to one output pixel per screen pixel. - On Step 8 · Preview & Export's
3Dboard the chip readsReset the view — zoom, pan and rotation, because the board has no other way back to its starting angles.
Several steps print the model right on the canvas. Step 3's line reads Scroll to zoom · middle-drag, right-drag or Alt+drag to pan., and Step 5's Fill zones toolbar ends with · wheel = zoom · middle/right/Alt-drag = pan · Ctrl+Z = undo.
Tip. Because zoom follows the cursor, aim before you scroll — wheel out where you are, then wheel back in on the next spot. One click on the % chip puts you back at 1:1.
Step 2 · Extend Canvas
| Action | Key or gesture | Where |
|---|---|---|
| Extend or crop the canvas | Left-drag a handle | Eight handles ring the frame: four corners and four edge midpoints. Outward extends, inward crops |
| Snap the margin to 16 px | Hold Shift while dragging | Any of the eight handles — a plain drag is 1 px precise |
| Type a margin instead | Click a per-side number field | The four inputs in the Canvas size — px per side grid on the right panel, ringed around the anchor pad |
The line under the canvas repeats it: drag outward to extend · inward to crop · Shift snaps to 16 px · magenta = the area AI paints · wheel zooms · middle-drag, right-drag or Alt+drag pans. See Step 2 · Extend Canvas.
Step 3 · Find & Cut
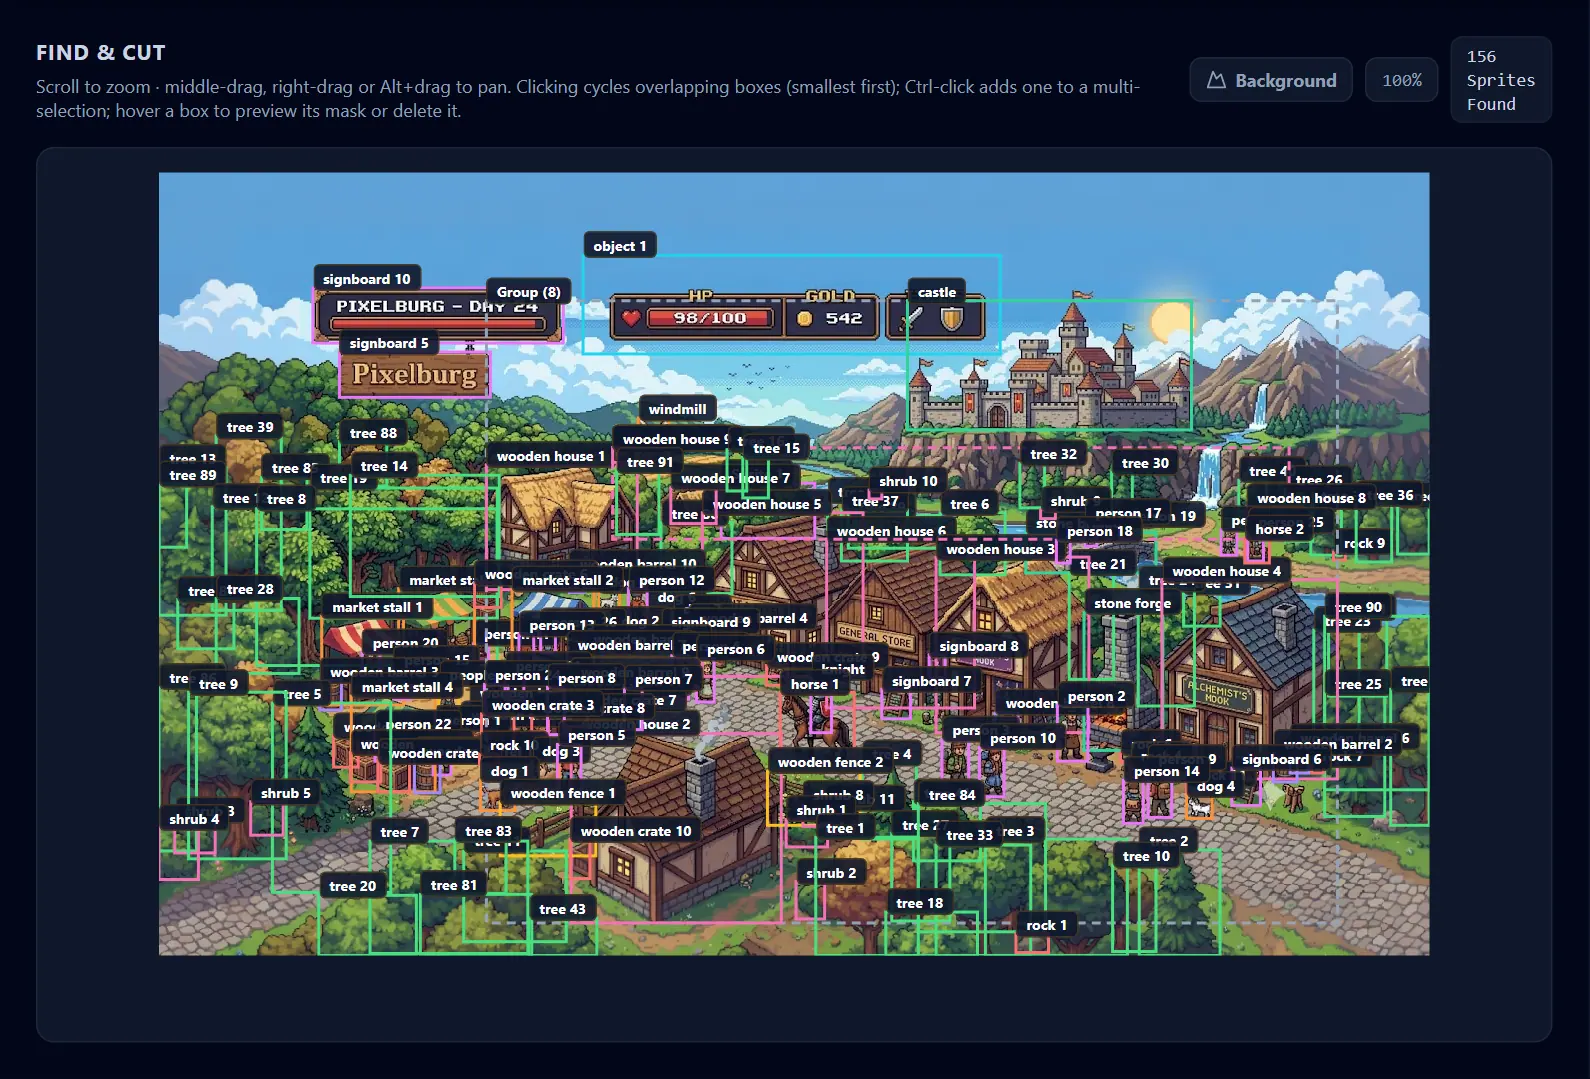
The canvas hint spells the selection model out in full: Clicking cycles overlapping boxes (smallest first); Ctrl-click adds one to a multi-selection; hover a box to preview its mask or delete it. See Step 3 · Find & Cut for what the controls those gestures reach actually do.
| Action | Key or gesture | Where |
|---|---|---|
| Select a box, then cycle through what overlaps it | Left-click | The canvas — real-pixel hits first, smallest box first, then boxes with no pixels to test yet; one click past the last one deselects |
| Clear the selection and any tag focus | Left-click empty artwork, or the dark letterbox | The canvas |
| Add or remove an element in the amber multi-selection | Ctrl / Cmd + click | Anywhere on the artwork, or a row in FOUND ELEMENTS — canvas and panel are mirrored |
| Preview an element's mask over a dimmed scene | Hover | A box, or a row in FOUND ELEMENTS |
| Delete a box and its element | Click the × that appears on hover | The box's top-right corner — undoable with Ctrl/Cmd+Z |
| Open the inline name ribbon | Double-click a box | The canvas |
| Rename, edit the mask, or find the row | Click the pill under the selected box | {name} · pencil · Edit mask · Show in list; the pill flips above the box near the bottom of the scene |
| Move an unmasked prompt box | Left-drag its body | Only while that box is the selected one and still has no mask |
| Resize a box | Left-drag a corner circle | An unmasked box moves live; a masked element re-cuts its crop from the original on release. The circles go dim while the element is showing an AI variant |
| Draw a new element | Left-drag on the artwork with New element armed | Releasing opens the Edit mask workspace in new-element mode |
Disarm New element | Esc | Step 3, while the mode is armed |
| Undo the last list operation | Ctrl / Cmd + Z | Step 3 — the same thing as the undo arrow in the FOUND ELEMENTS header, whose tooltip names the step it would undo |
| Select a row, or deselect the one already selected | Click a row | FOUND ELEMENTS |
| Expand or collapse a group | Click the chevron | A group row in FOUND ELEMENTS — Show the group's members / Collapse members |
| Collapse or expand a whole category | Click its heading | The uppercase tag headings in FOUND ELEMENTS |
| Highlight a tag's elements over a dimmed scene | Click a tag chip | The tag rack; Ctrl/Cmd-click lights up several, and clicking the only lit one clears it. It highlights — it does not change the selection |
Step 3's Ctrl/Cmd+Z is deliberately narrow. It stands down while anything modal is on top of it — the Edit mask workspace most of all, since that dialog keeps its own undo for the mask it is painting — and while the caret is in a text field, so the browser's own undo still works inside a rename. There is no redo, and the history is cleared when you leave the step.
Dragging rows in FOUND ELEMENTS
Rows are draggable, and every drop shows a hint before you let go.
| Action | Key or gesture | Where |
|---|---|---|
| Move an element into a group | Drop a row onto the group row, or onto the indented rail beside its members | The folder lights up and opens |
| Re-tag an element into another category | Drop a row onto a category header, onto a row filed under it, or beside those rows | The header and its rows light up together |
| Reorder two rows at the same level | Drop on a row's thin top or bottom edge | An indigo bar shows which side |
| Lift a row out of its group | Drop on the list's empty space | The element keeps its tag |
| Drag the whole multi-selection | Drag any row that is part of it | The Ctrl-built set travels together |
Step 4 · Rebuild Backplate
The step prints its own line: Scroll to zoom · middle-drag, right-drag or Alt+drag to pan · Ctrl+Z undoes the last change.
| Action | Key or gesture | Where |
|---|---|---|
| Paint or erase the hole mask | Left-drag on the canvas | Stage ①, with Brush or Eraser picked; painting with the holes showing arms the stage by itself |
| Paint the touch-up region | Left-drag on the canvas | Stage ②, once a take is on screen — the amber area the next fix replaces |
| Set the brush size | Pick from the Brush size menu | The canvas toolbar — a fixed ladder from 1 px to 50 px; a ring of that size follows the cursor while you paint |
| Undo one destructive edit | Ctrl / Cmd + Z | Step 4 — the same thing as the Undo chip, whose tooltip names what is next in line |
| Use a take as the backdrop | Click its thumbnail | TAKES — CLICK TO USE · CLICK THE ACTIVE ONE TO PEEK THE HOLES |
| Peek the original under the take in use | Click the take that is already in use | View only; the thumbnail turns dashed |
| Stop peeking and show the take again | Esc | Step 4, while a take is on screen |
| Rename a background layer or touch-up | Double-click its name | The layer rows on the right rail |
Step 4's undo follows the same rule as Step 3's: step-scoped, nothing modal on top, text fields excluded, no redo, and the history is cleared when you leave the step. A generation arriving is never in it.
Step 5 · Finish Sprites
Step 5 has one section, Rebuild sprites, and its sprites move through three shelves — QUEUED, RESULTS, APPROVED. Two gestures share the scene boxes: a short press selects a sprite, and a press that travels more than about 4 px moves it instead.
The scene
| Action | Key or gesture | Where |
|---|---|---|
| Select a sprite and open its versions | Left-click a sprite | The scene — the rail scrolls its tile into view and rings it |
| Move a sprite | Left-drag a sprite past ~4 px | The scene; the rail is deliberately left alone mid-drag |
| Scale a sprite proportionally about the opposite corner | Left-drag a corner dot | The four dots show only while exactly one sprite is selected |
| Reset a sprite to its natural geometry | Double-click it | The scene — the same thing as Reset in the readout |
| Nudge the selected sprite 1 source pixel | Arrow keys | Step 5, one sprite selected, with Compare off and Hold not down |
| Nudge it 10 source pixels | Shift + arrow keys | Same |
| Add a sprite to the multi-selection | Ctrl / Cmd + click | The scene or a rail tile; the plain selection seeds the set |
| Deselect everything | Esc, or click the artwork between the boxes | Step 5 |
| Toggle the state tint over every sprite | Click the States checkbox | The canvas toolbar, while the scene is the surface on screen — it is not offered over the packed sheet or the solo preview |
With one sprite selected, a readout floats at the bottom of the viewport: the sprite's name, how far it now sits from its original cut-out box as Δ 0, 0px, its width against that box as scale 100%, a Reset button, the Snap split-button, and the reminder drag = move · corners = scale · arrows = nudge (Shift ×10) · dbl-click = reset. Select two or more and it becomes the set's readout instead — {N} sprites, Reset all, Snap {N}, and the bulk Edge and Match chips described in Sprite repair.
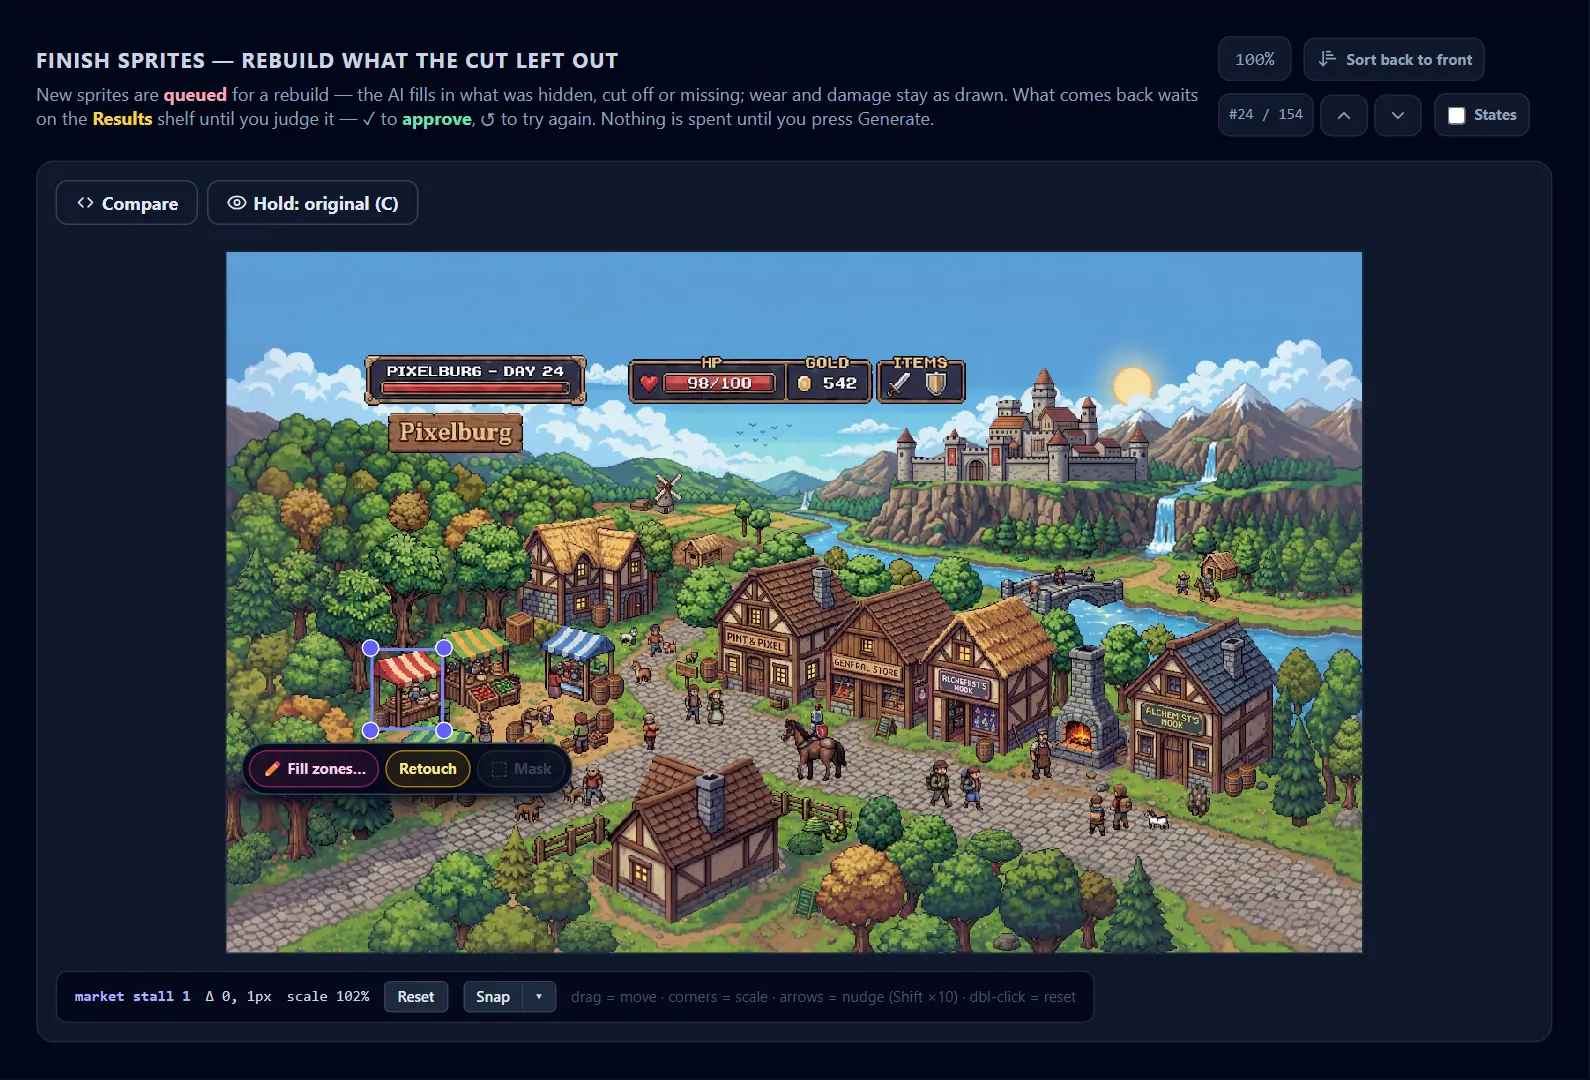
Tip. Rough a sprite in with a drag, then place it exactly with the arrow keys — 1 source pixel a press, 10 with Shift held.
The rail, the tiles and the version row
| Action | Key or gesture | Where |
|---|---|---|
| Select a sprite and open its versions | Click a tile | The Rebuild sprites rail; clicking the same tile again closes the row |
| Approve a result, or un-approve it | Click the tile's ✓ corner | Every tile; it swallows the click, so the versions do not open |
| Queue a sprite for another try | Click the tile's ↺ corner | A result or an approved tile; already-queued tiles do not react |
| Open zone painting for that sprite | Click the tile's 🖌 corner | Queued tiles |
| Send that sprite's zone as a real mask | Click the tile's ▨ corner | Queued tiles, and dim until the sprite has a zone — Draw Fill zones first — the mask is derived from them. The same switch as Mask on the scene pill |
| Pick a queued sprite into this run, or drop it | Click the tile, or its ↺ corner | Only while hand-pick's Pick mode is armed; versions still open from the other two shelves. See Calls & sheets |
| Build a bulk-reuse selection | Ctrl / Cmd + click tiles | At two or more, a row splices in under the last tile: {N} selected, ⧉ Use one result for all {N}…, ✕ clear; a plain click then just clears the set |
| Apply a version to the scene | Click its thumbnail | The version row — the left column stays on the whole scene, unless that sprite is already solo, when the solo steps to the version instead |
| Show one version alone, big and zoomable | Click the S badge in a thumbnail's corner | The badge lights cyan; pressing it again gives the scene back |
| Open the repair window on the shown version | Click the 🔧 badge | The version row, and Retouch on the scene pill |
| Leave the solo view | Click ◀ Scene | The solo header — the same as pressing the lit S badge |
| Close the version row | Click its ✕ | Nothing else changes; Esc closes it too, but it drops the selection with it |
The row header names three of those itself: Versions of {name} · click to APPLY · Ⓢ solo, again for the scene · 🔧 retouch.
The packed sheet, fill zones and the completion frame
| Action | Key or gesture | Where |
|---|---|---|
| Pick a sprite's version from the sheet | Click that sprite's cell | A packed view that has results to judge; cells the run returned nothing for do not react |
| Paint where the AI may draw | Left-drag inside a cell | With Fill zones on; a stroke stays inside the cell it started in |
| Erase part of a zone | Click Eraser, then left-drag | The Fill zones toolbar |
| Set the zone brush | Drag the Brush slider | 2–64 px, in the sprite's own pixels |
| Undo one stroke or one clear | Ctrl / Cmd + Z, or the Undo chip | Only while the brush is up; a clear of eight cells comes back in one step |
| Empty the cell you last touched | Click Clear cell | The Fill zones toolbar |
| Empty every cell on the sheet | Click Clear all zones | Offered only when the sheet holds more than one sprite |
| Move the sprite inside its cell | Left-drag the ✥ pad | The completion frame; the gap it leaves on each side is the room the AI may rebuild into |
| Leave the sheet view | Click ◀ Back | The header pill |
The Calls panel
Opened with the eye button beside Generate, whose tooltip starts Calls — how the {N} queued calls pack, which run, drag a sprite to another.
| Action | Key or gesture | Where |
|---|---|---|
| Re-pack a sprite into another call | Left-drag its name chip onto that call's card | The Calls panel; the card lights up when it will take the sprite and turns amber with the reason when it will not |
| Give a sprite a call of its own | Drop its chip on + drop here to start an empty call | Same — one more paid call |
Chips stop being draggable while Auto-reduce sheets is packing the queue for you, and while hand-pick's Pick mode is armed. Both say so in the chip's own tooltip. See Calls & sheets.
The Edit mask workspace
Four things open it, all of them on Step 3: the brush icon on a FOUND ELEMENTS row, Edit mask on the pill under a selected box, Mask — {name} in the canvas toolbar, and releasing a New element drag, which opens it in new-element mode. It brings its own deeper zoom and its own undo history, and it is the one surface in the app that changes the pointer rules.
One polarity rule covers every tool here: left adds to the mask, right removes from it, and Shift+left removes too — the alias for pointers with no comfortable right click. Because the right button is spoken for, right-drag does not pan here; pan is middle-drag or Alt+left-drag only. Neither this workspace nor the repair window ever opens a context menu, on the art or on the dim margin around it.
| Action | Key or gesture | Where |
|---|---|---|
| Add to the mask | Left-click or left-drag | Tap · Element · Brush · Box |
| Remove from the mask | Right-click, right-drag, or Shift + left | The same four tools |
| Preview the region a click would take | Hover | Tap and Element — a tint on the art and a chip at the cursor naming it |
| Re-aim that preview without moving the cursor | Press or release Shift | Tap and Element; the polarity changes what the next click does, so the preview follows the key |
| Keep taking regions into one undo entry | Hold the button and sweep | Tap and Element |
| Commit a rectangle | Left-drag a marquee and release | Box — nothing is written while you drag |
| Zoom in or out at the cursor | Scroll wheel | 0.05×–64×, far past the main canvases, for pixel-level work |
| Pan | Middle-drag or Alt + left-drag | Right-drag is the remove gesture here, so it does not pan |
| Reset the zoom | Click the {NN}% chip | Titled Reset zoom to 100% (1:1 pixels, centered) |
Open Tap settings | Click the Tap chip while Tap is already live | Tolerance, Reach, Sample |
| Set the brush size, and its footprint | Pick from the Brush size menu, then the round or square chip | Both appear beside Brush only while Brush is the live tool; sizes run 1 px to 50 px |
| Keep a split piece in this element, or hand it back | Click the piece | ◱ Split mode's pieces overlay — the click toggles it |
| Delete a split piece | Click the ✕ on its cyan box | Same; clicking where a deleted piece sat brings it back |
| Undo | Ctrl / Cmd + Z | The workspace's own history — separate from the step's |
| Redo | Ctrl / Cmd + Shift + Z, or Ctrl / Cmd + Y | Both chords work, and the redo button's tooltip names both: Redo (Ctrl+Y) — Ctrl+Shift+Z does the same |
| Step back one layer | Esc | Closes an open toolbar panel, then the pieces overlay, then ◱ Split mode, then the workspace |
| Close without applying | Click the ✕, or press a plain left button on the dim backdrop | A right, middle or Alt press near the edge will not close it |
A fixed status row along the bottom names the live tool and spells out its gestures. Under Tap it reads takes the colour area under the cursor · left = add · right (or Shift+left) = remove · hold and sweep for several · wheel = zoom · middle/Alt-drag = pan, and the % chip sits at its right end.

Esc has one deliberate exception: while a split preview is still waiting on you, it will not leave the mode, but it does not stop dead either — it skips that rung and closes the workspace, so this is never a room you cannot Esc out of. While an AI run is in flight all three exits stand down together — Esc does nothing, the ✕ goes dim with An AI run is in flight — let it finish first, and the backdrop stops answering — so a spend in progress can never be orphaned. Full detail is on Mask editor.
The repair window
Opened from a version's 🔧 badge or Retouch on the scene pill. Unlike the mask workspace this one keeps the right button for panning, because its eraser is a tool of its own — and it is the only surface in the app that binds letters to tools.
Every mask gesture below belongs to the FILL HOLES block. Fold that block away and the canvas stops answering clicks entirely, while zoom, pan and the peek stay live — collapsing it is how you look at the sprite without a pink plate over it.
| Action | Key or gesture | Where |
|---|---|---|
| Select just the hole under the cursor | Left-click | Pick |
| Add or remove a hole from the selection | Shift + click | Pick |
| Add a color area | Left-click | Tap |
| Remove a color area, and drop any hole it touches | Shift + click | Tap |
Open Tap settings | Click the Tap chip while Tap is already live | Tolerance, Reach, Sample — the same three knobs as the mask workspace |
| Paint an area to be filled | Left-drag | Brush |
| Wipe paint, and drop any detected hole it touches | Left-drag | Eraser |
| Add a rectangle | Left-drag | Box |
| Remove a rectangle, and drop any hole it touches | Shift + drag | Box |
| Switch to the brush | B | While the FILL HOLES section is open, and not while typing |
| Switch to the eraser | E | Same |
| Step the brush size down or up | [ and ] | Same — through 1, 2, 4, 8, 12, 16, 24, 32, 40, 50 px |
| Zoom in or out at the cursor | Scroll wheel | 0.05×–64×, the same range as the mask workspace |
| Pan | Middle-drag, right-drag or Alt + left-drag | All three, as on the step canvases |
| Fit the whole crop in the viewport | Click ⤢ fit | Beside the % chip |
| Reset the zoom to 1:1 | Click the {NN}% chip | Titled Reset zoom to 100% (1:1 pixels, centered) |
| Peek the original sprite | Hold Hold: original (C), or hold C | Works whether or not the fill section is open |
| Undo · redo | Ctrl / Cmd + Z · Ctrl / Cmd + Shift + Z or Ctrl / Cmd + Y | One ring over the fill mask and the EDGE and MATCH ORIGINAL dials |
| Close a popover, then the window | Esc | Tap settings first, then the window itself — and nothing at all while a paid fill is in flight |
| Close without applying | Plain left press on the dim backdrop | A right, middle or Alt press near the edge is a pan, not a dismiss |
There is no double-click gesture on this canvas: plain left is the tool, and two quick dabs at pixel zoom are a normal way to work. Full detail is on Sprite repair.
Step 6 · Add Shadows
The sentence above the tree says it: Click a sprite to select it · Ctrl-click adds one, Shift-click takes the range · Scroll to zoom · middle-drag, right-drag or Alt+drag to pan · Esc clears the selection.
| Action | Key or gesture | Where |
|---|---|---|
| Select a sprite | Left-click it on the preview, or click its row | The preview and the Shadow groups tree share one selection |
| Add or remove a sprite in the bulk selection | Ctrl / Cmd + click | The preview or a tree row |
| Take the range between your last click and this one | Shift + click | The preview or a tree row — only rows you can actually see, so a collapsed group's members are excluded |
| Clear the selection | Esc | Step 6 — it drops the edit target and the bulk set together; the bulk banner's ✕ clears only the bulk set |
| Group two sprites | Drag one row onto another | Shadow groups |
| Add a sprite to an existing group | Drag its row onto the group's header row | Same |
| Give a sprite its own shadow back | Drag its row into Ungrouped | Same |
| Drag the whole bulk selection | Drag any row that is part of it | Same |
| Move the whole bulk selection into a group | Click that group's header while the selection is up | Same |
| Rename a group | Click the pencil on its header, type, then Enter or Esc | Both keys close the field; the name is written as you type |
Step 7 · Final Polish
| Action | Key or gesture | Where |
|---|---|---|
| Zoom, pan, reset | The shared gestures above | The preview |
| Fit the scene to the panel | Click Fit | The canvas toolbar |
| Zoom to one output pixel per screen pixel | Click 100% | The canvas toolbar |
| Peek the original | Hold Hold: original (C), or hold C | The preview |
Step 8 · Preview & Export
| Action | Key or gesture | Where |
|---|---|---|
| Orbit the depth stack | Left-drag anywhere over the board | The 3D view; the tilt is clamped so the scene cannot flip under the floor |
| Put the board back to its starting angles, zoom and pan | Double-click the board, or click the {NN}% chip | The 3D view; an Alt double-click is refused, so two quick Alt-pans never throw the angle away |
| Zoom and pan | The shared gestures above | Both views |
| Switch views | Click 3D or 2D | The canvas toolbar |
Nothing on this step is selectable. A click on the 2D composite does nothing, and a click on the board only ends an orbit. Placement and paint order are edited back on Step 5 · Finish Sprites.
Compare and peek
Five steps let you check your work against what went in without leaving the canvas, and they all carry the same pair of floating buttons in the top-left corner of the preview.
| Action | Key or gesture | Where |
|---|---|---|
| Show the before state while held | Press and hold Hold: original (C), or hold the C key | Steps 4, 5, 6, 7 and 8's 2D view, plus the repair window |
| Turn the wipe on or off | Click Compare | The same five steps |
| Jump the divider and drag it | Left-press anywhere over the image, then drag | Left button only, so middle-, right- and Alt-drag still pan |
Press-and-hold wins while both are on, and Ctrl/Cmd/Alt + C is left alone as a copy chord rather than taken as a peek. Only what "the original" means changes from step to step.
| Step | What the before state is |
|---|---|
| Step 4 · Rebuild Backplate | The original image under the backdrop in use. |
| Step 5 · Finish Sprites | The original image under the scene, once something has been applied to it. With nothing applied the two are the same picture, so the chips do not appear. |
| Step 6 · Add Shadows | The original image. |
| Step 7 · Final Polish | The original image. |
Step 8 · Preview & Export, 2D | The original upload under your composite. |
Careful. While Compare is armed on Step 5 the divider owns the pointer: the corner dots, the action pill and the arrow-key nudge all stand down, because the left half of the picture is the untouched original and sprite chrome there would describe geometry it does not have yet. Turn Compare off and the gizmo is back, untouched.
Text fields
Renaming looks the same everywhere but behaves in two ways, and it is worth knowing which you are in.
| Action | Key or gesture | Where |
|---|---|---|
| Commit the name and close | Enter | The pencil rename on a FOUND ELEMENTS row, a background layer's name, Step 3's add-tag field |
| Cancel and discard | Esc | The same three |
| Close the field (the name is already written) | Enter or Esc | The name ribbon on a Step 3 box, and a shadow group's name |
| Read a typed hex into the picker | Enter | The palette color picker's hex field — Esc there closes the whole picker rather than the field |
An empty box name falls back to Sprite {N}. Step 3's undo, Step 4's undo, the C peek, Step 5's zone undo, Step 5's arrow-key nudge and both Esc deselects all stand down while the caret is in a text field, so naming a layer never nudges a sprite or throws away a list. The nudge is the strictest of them: it also stands down inside a dropdown, so an arrow key aimed at a model picker changes the model and not the sprite.
Note. The Projects panel is mouse-only — it binds no key and no modifier anywhere. Renaming a project there is committed with its own tick, titled Save name, and dropped with the cross beside it, titled Cancel; Enter and Esc do nothing in that field. See Projects & autosave.
Every keyboard shortcut
Shortcuts are scoped to the step or dialog that owns them. There is no global hotkey for moving between the eight steps — use the stepper.
| Action | Key or gesture | Where |
|---|---|---|
| Undo the last list operation | Ctrl / Cmd + Z | Step 3 · Find & Cut. Adds, deletes, tag removals, box resizes, drag and drop, group, ungroup and split are all in it. No redo |
| Undo one destructive edit | Ctrl / Cmd + Z | Step 4 · Rebuild Backplate. Brush strokes, Grow, Shrink, Reset mask, a deleted touch-up and a deleted take. No redo |
| Undo the last zone stroke or clear | Ctrl / Cmd + Z | Step 5, while Fill zones is on. No redo |
| Undo · redo | Ctrl / Cmd + Z · Ctrl / Cmd + Shift + Z or Ctrl / Cmd + Y | The Edit mask workspace and the repair window, each over the mask it is painting |
| Peek the original while held | Hold C | Steps 4, 5, 6, 7, 8's 2D view, and the repair window |
| Nudge the selected sprite 1 px · 10 px | Arrow keys · Shift + arrow keys | Step 5 · Finish Sprites, one sprite selected |
| Snap a margin to 16 px | Hold Shift while dragging a handle | Step 2 · Extend Canvas |
| Remove instead of add | Shift + left | The Edit mask workspace's four tools; and Tap and Box in the repair window, where Shift on Pick toggles a hole in or out instead |
| Switch to brush · eraser | B · E | The repair window, FILL HOLES open |
| Brush size down · up | [ · ] | The repair window, FILL HOLES open |
| Deselect | Esc | Step 5's scene, and Step 6, whose preview and shadow tree share one selection |
Disarm New element | Esc | Step 3, while the mode is armed |
| Stop peeking the holes | Esc | Step 4, while a take is on screen |
| Close whichever popover, overlay or mode is on top, then the dialog | Esc | The Edit mask workspace |
Close Tap settings, then the window | Esc | The repair window |
| Close it | Esc | Step 5's reuse picker, raw-output viewer and text-changed comparison; the palette color picker; the version row, which goes with the selection |
| Cancel it | Esc | The five confirmations that spend or destroy — it performs exactly that dialog's own Cancel and never confirms anything |
| Activate the focused palette | Enter or Space | The palette rack on Step 7 |
| Commit · cancel a rename | Enter · Esc | Any draft rename field, per the two field types above |
Note. Ctrl/Cmd+Shift+Z does nothing on Steps 3, 4 and 5: those three histories only remember the state before each change, so they walk backwards only. The Edit mask workspace and the repair window do have a real redo stack, and their buttons say so.